Introduction
You might have to replace the controller on your Stunner Lite 3 eBike in some cases when errors occur. Follow these instructions to replace this part!
You will need the following tools:
Phillips Screwdriver
4mm Allen Key

Step 1
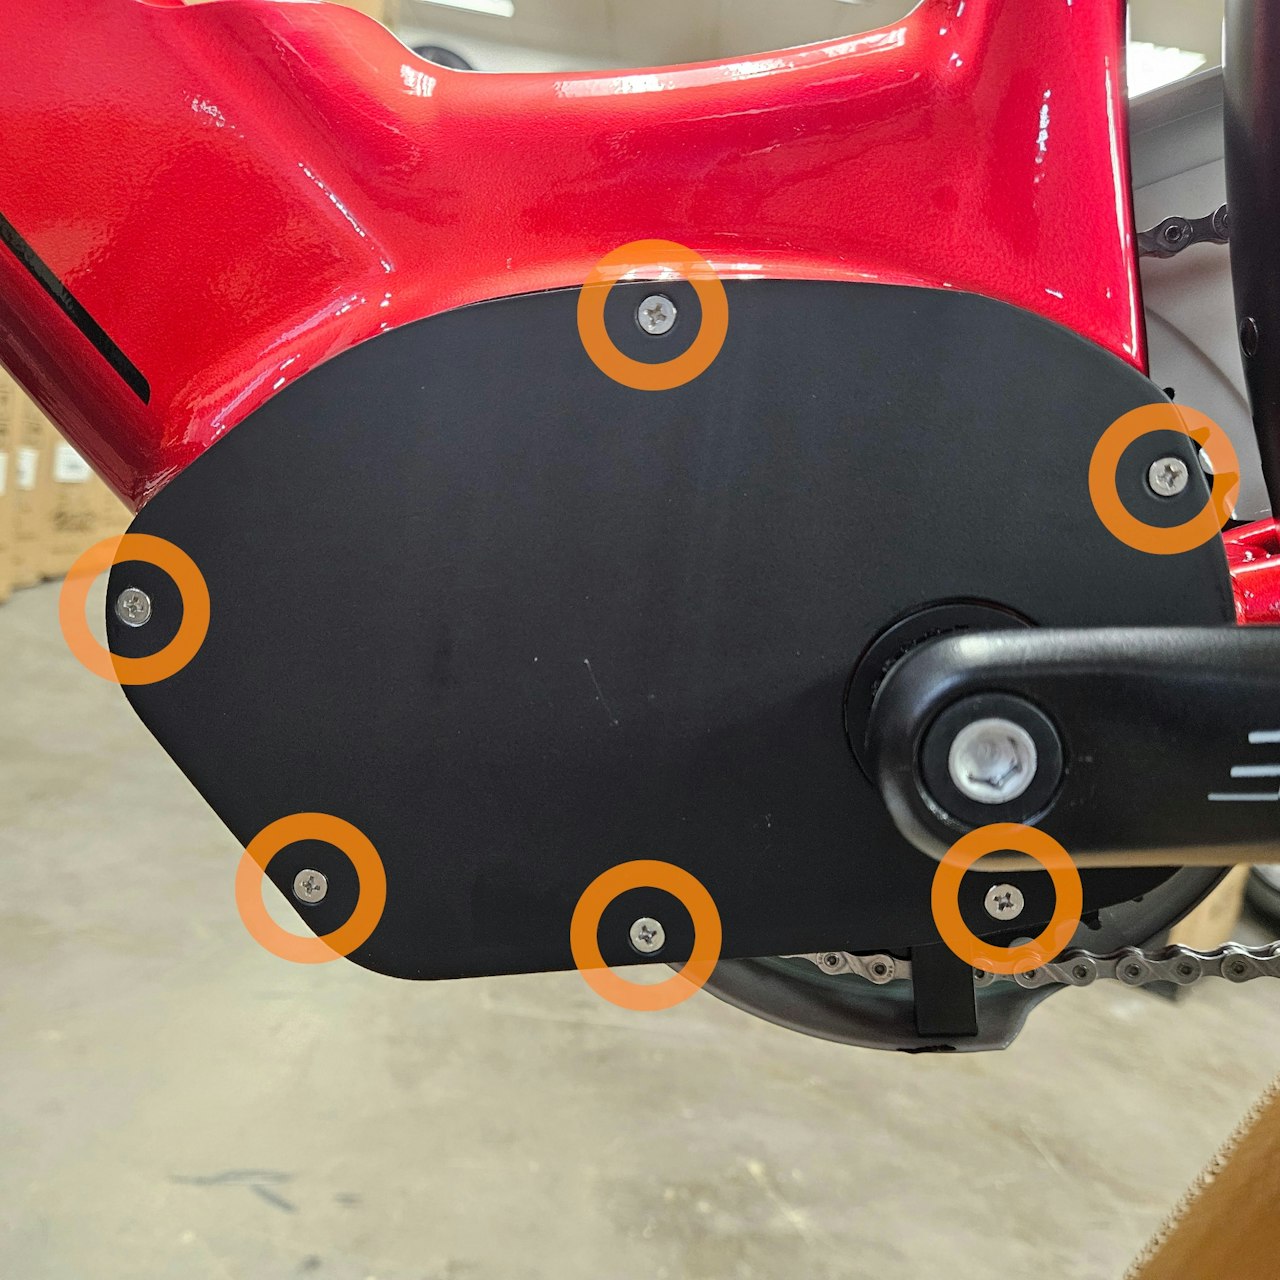
Remove the 5 circled screws on the controller cavity cover of the eBike using a phillips screwdriver.
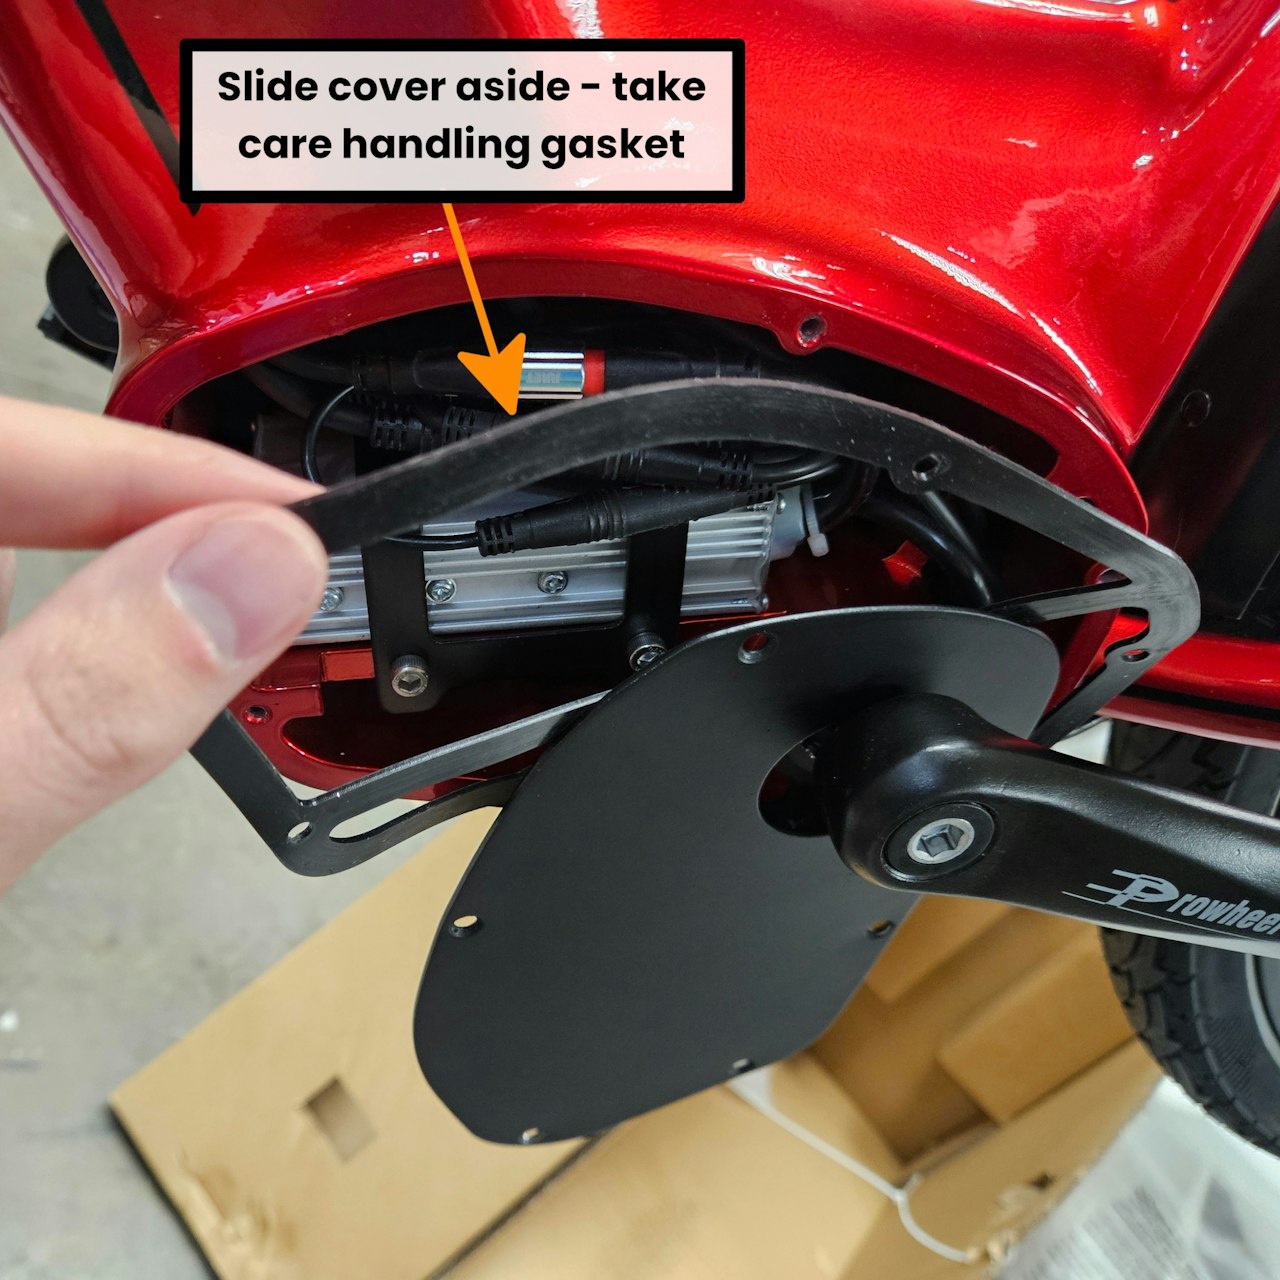
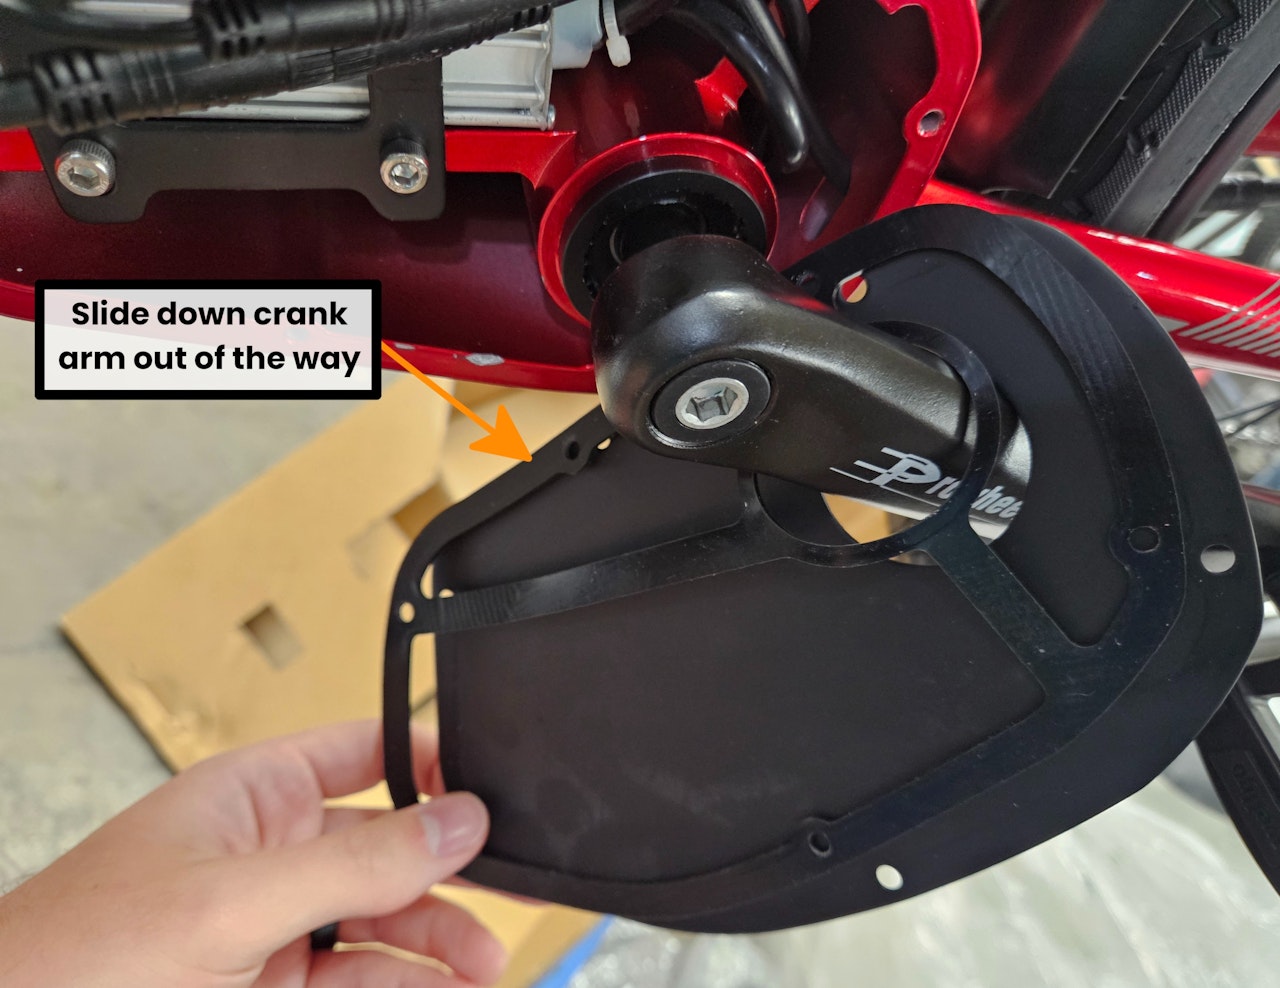
With the screws removed, pull away the controller cover and gasket from the frame. Take care with the gasket so you do not rip it!
Slide the gasket and controller cover down the crank arm

Step 2
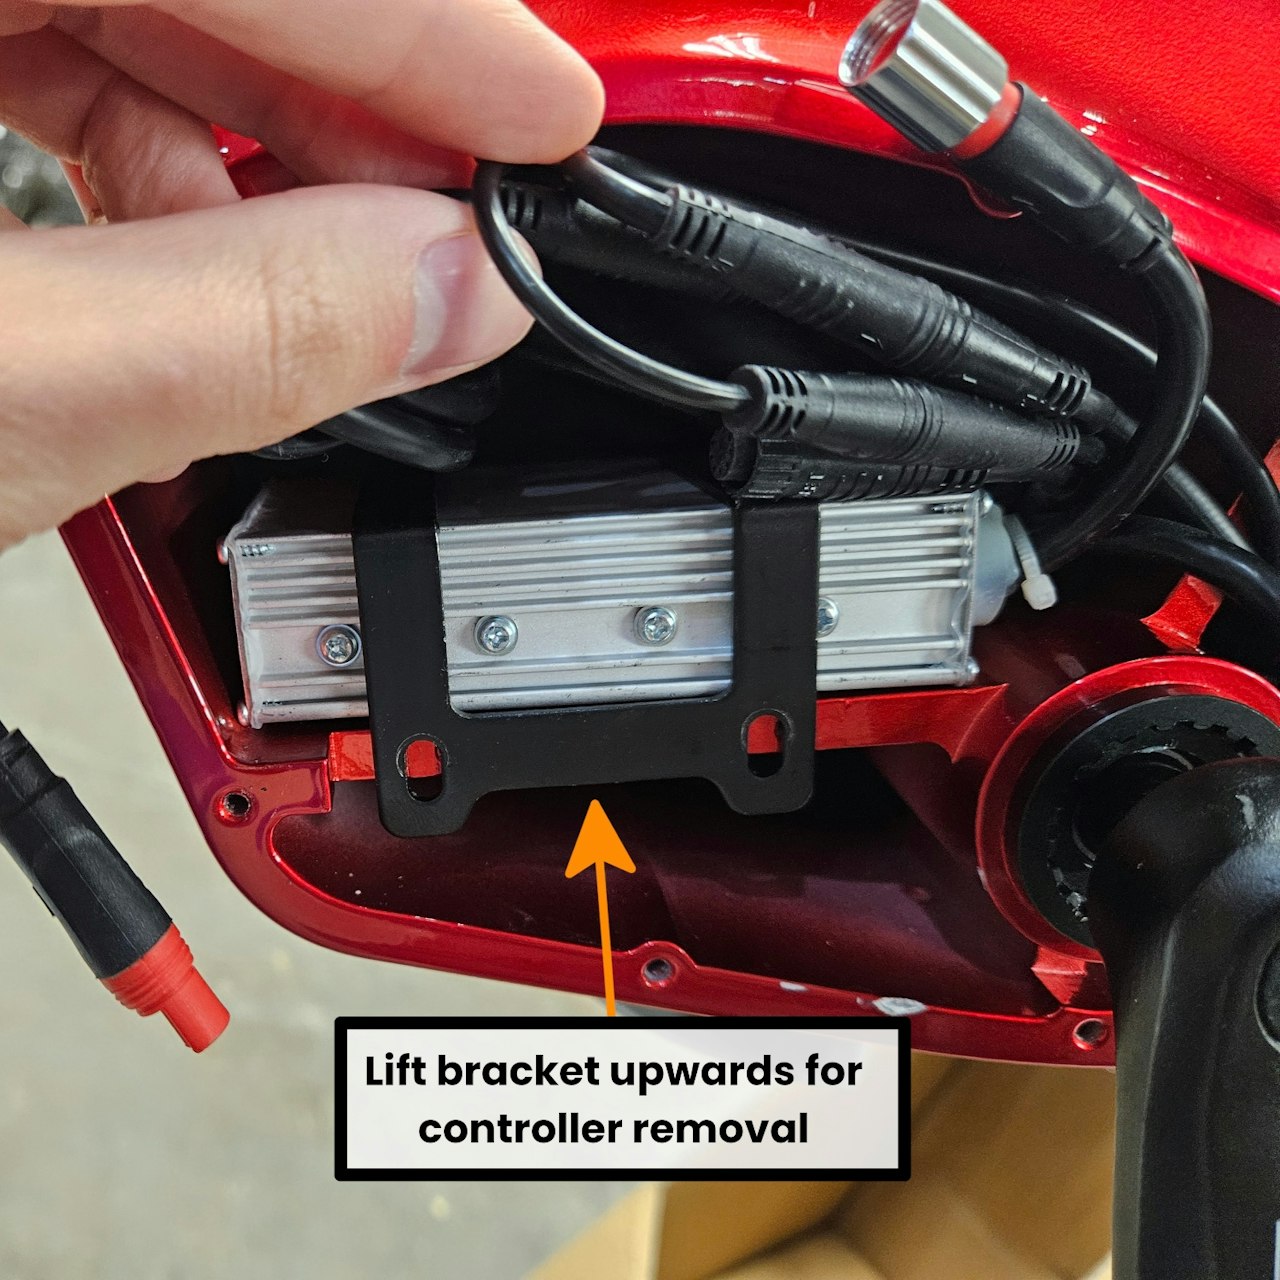
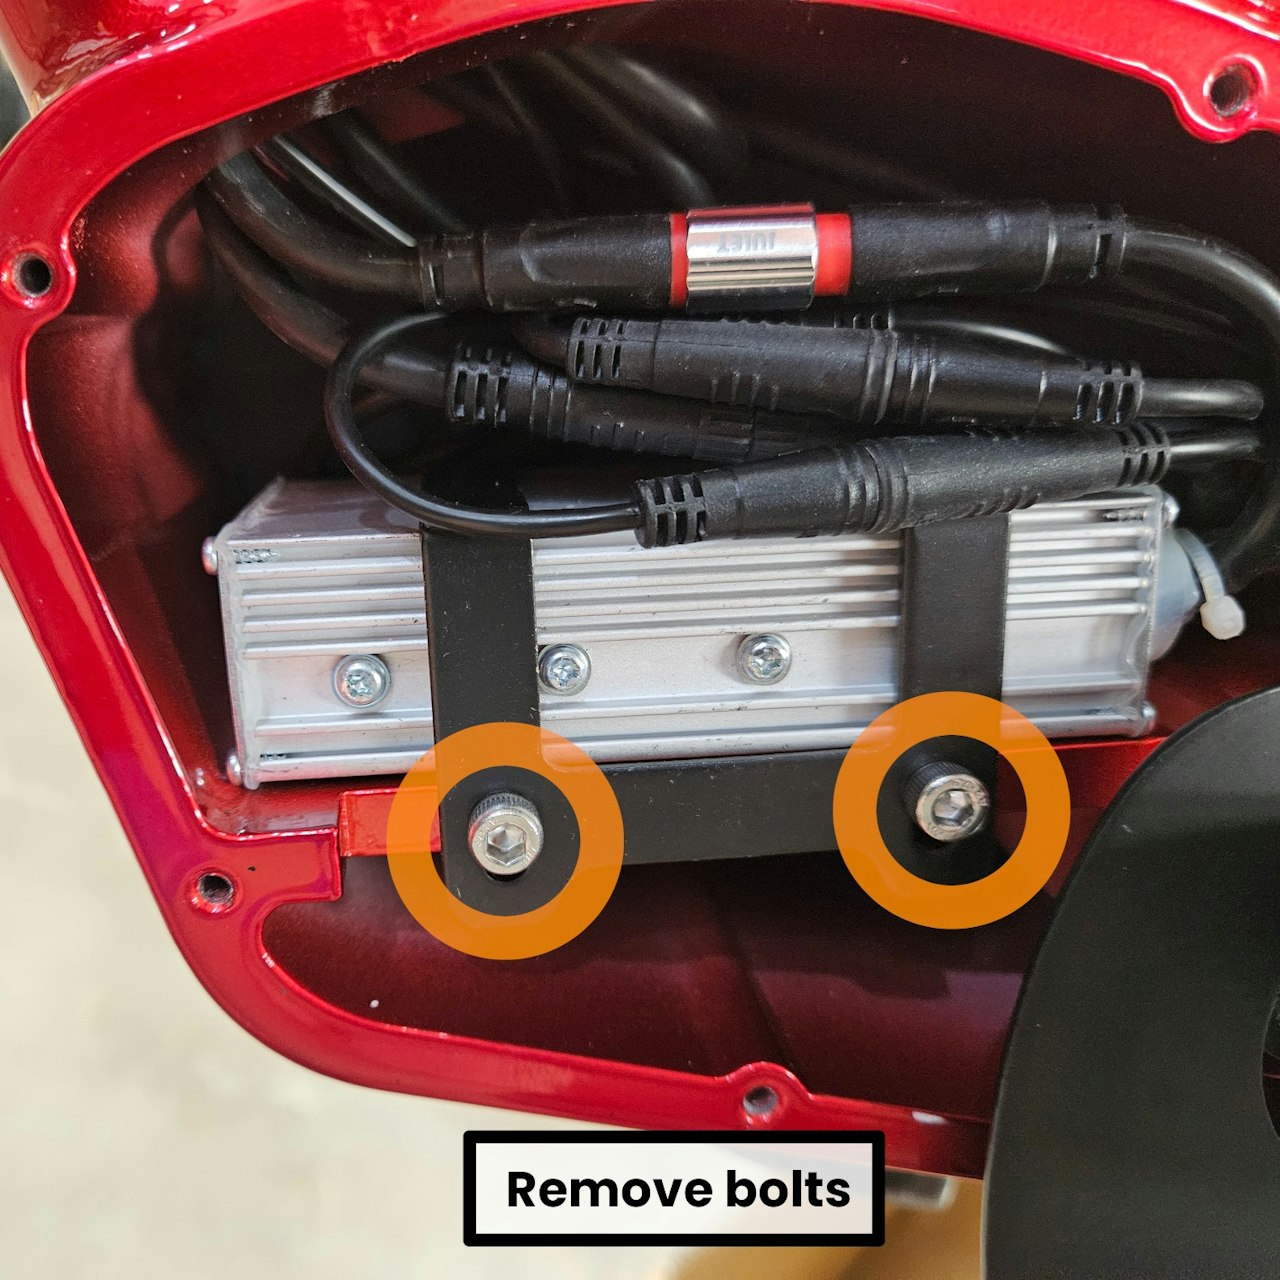
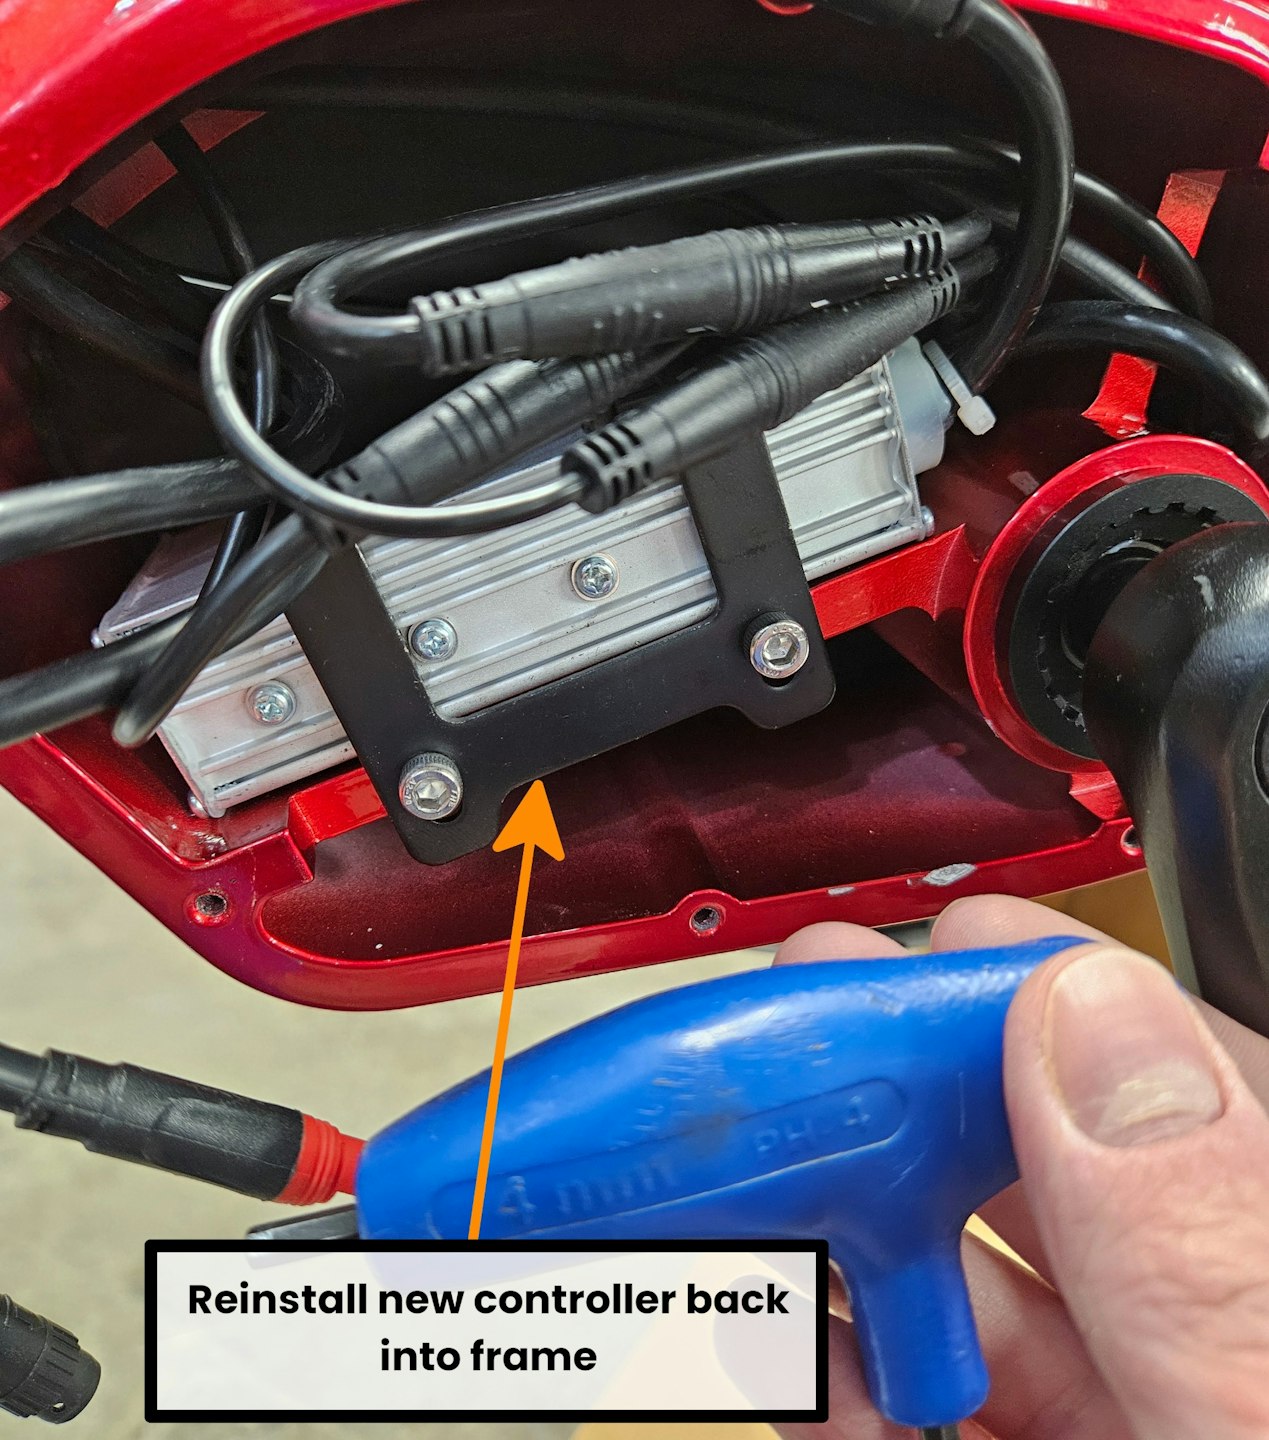
Remove the two circled bolts with a 4mm Allen Key
Push the bracket UPWARDS to unlatch the other side
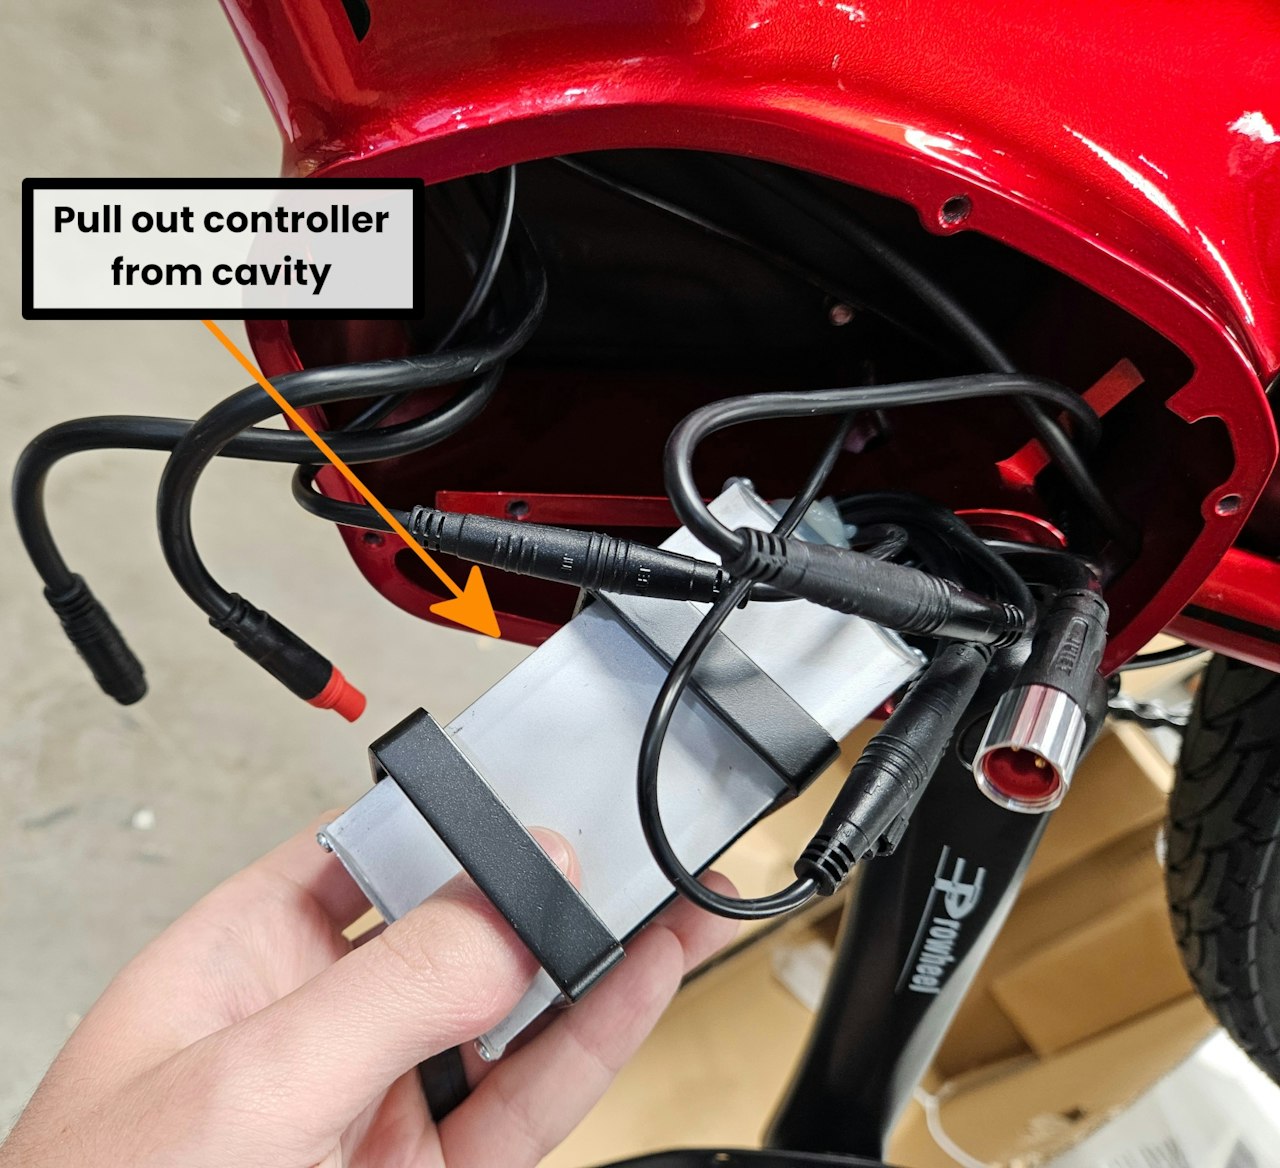
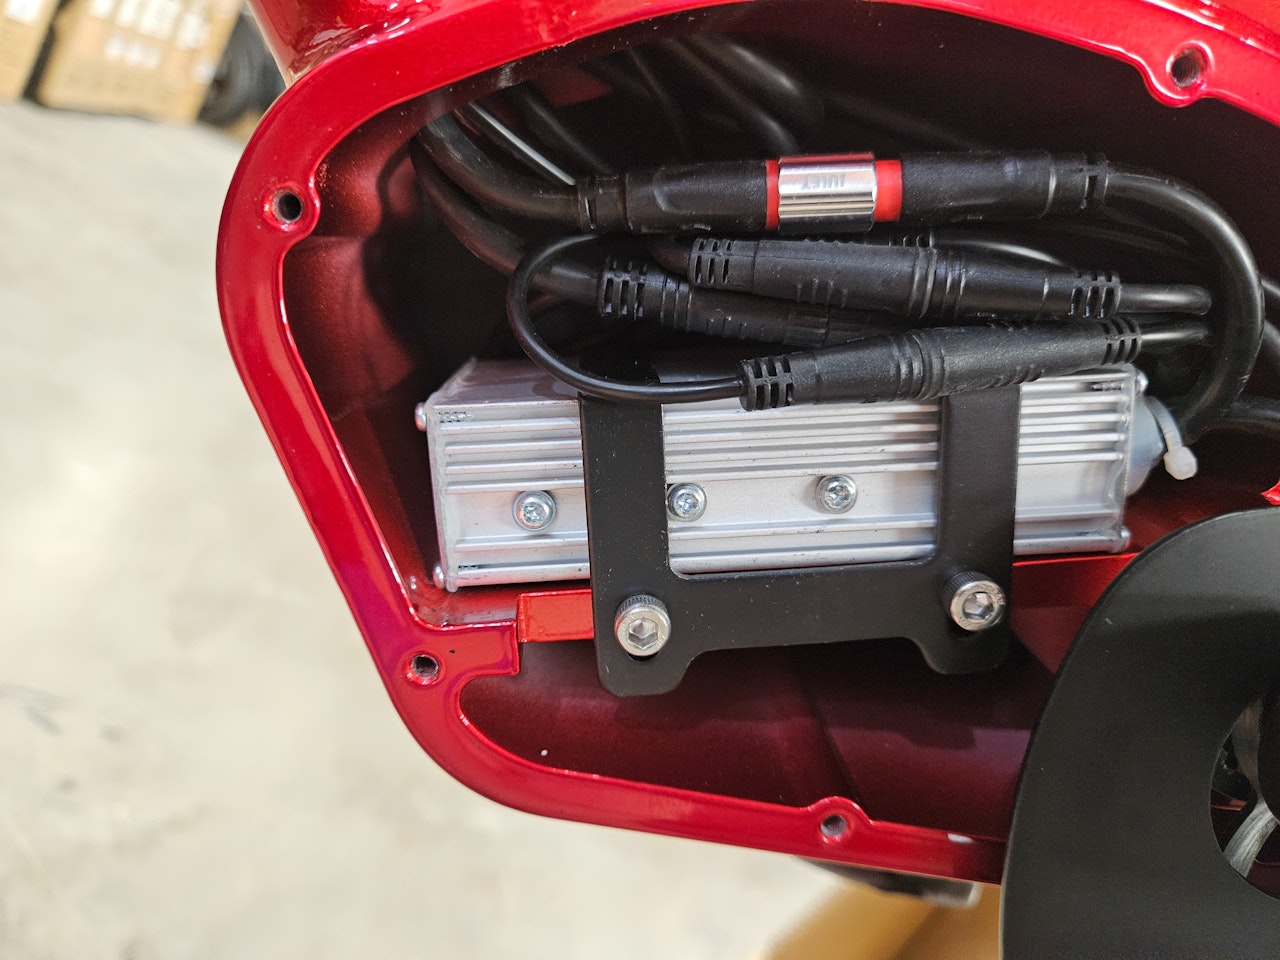
Pull out the controller from the internal cavity

Step 3
One at a time, unplug a connector from your faulty controller, and plug it into your good functioning controller.
Doing these one at a time ensures you will not miss anything!
Take care unplugging the connectors - NONE NEED TO BE TWISTED FOR REMOVAL! Gently pulling and wiggling should be all you need.
It might help to use some tape to write "GOOD" and "BAD" on each controller ot ensure you know which one is which before starting this!
With the new controller's connectors now plugged in, install the new controller into the eBike - reversing the steps you followed to remove the old controller.

Step 4
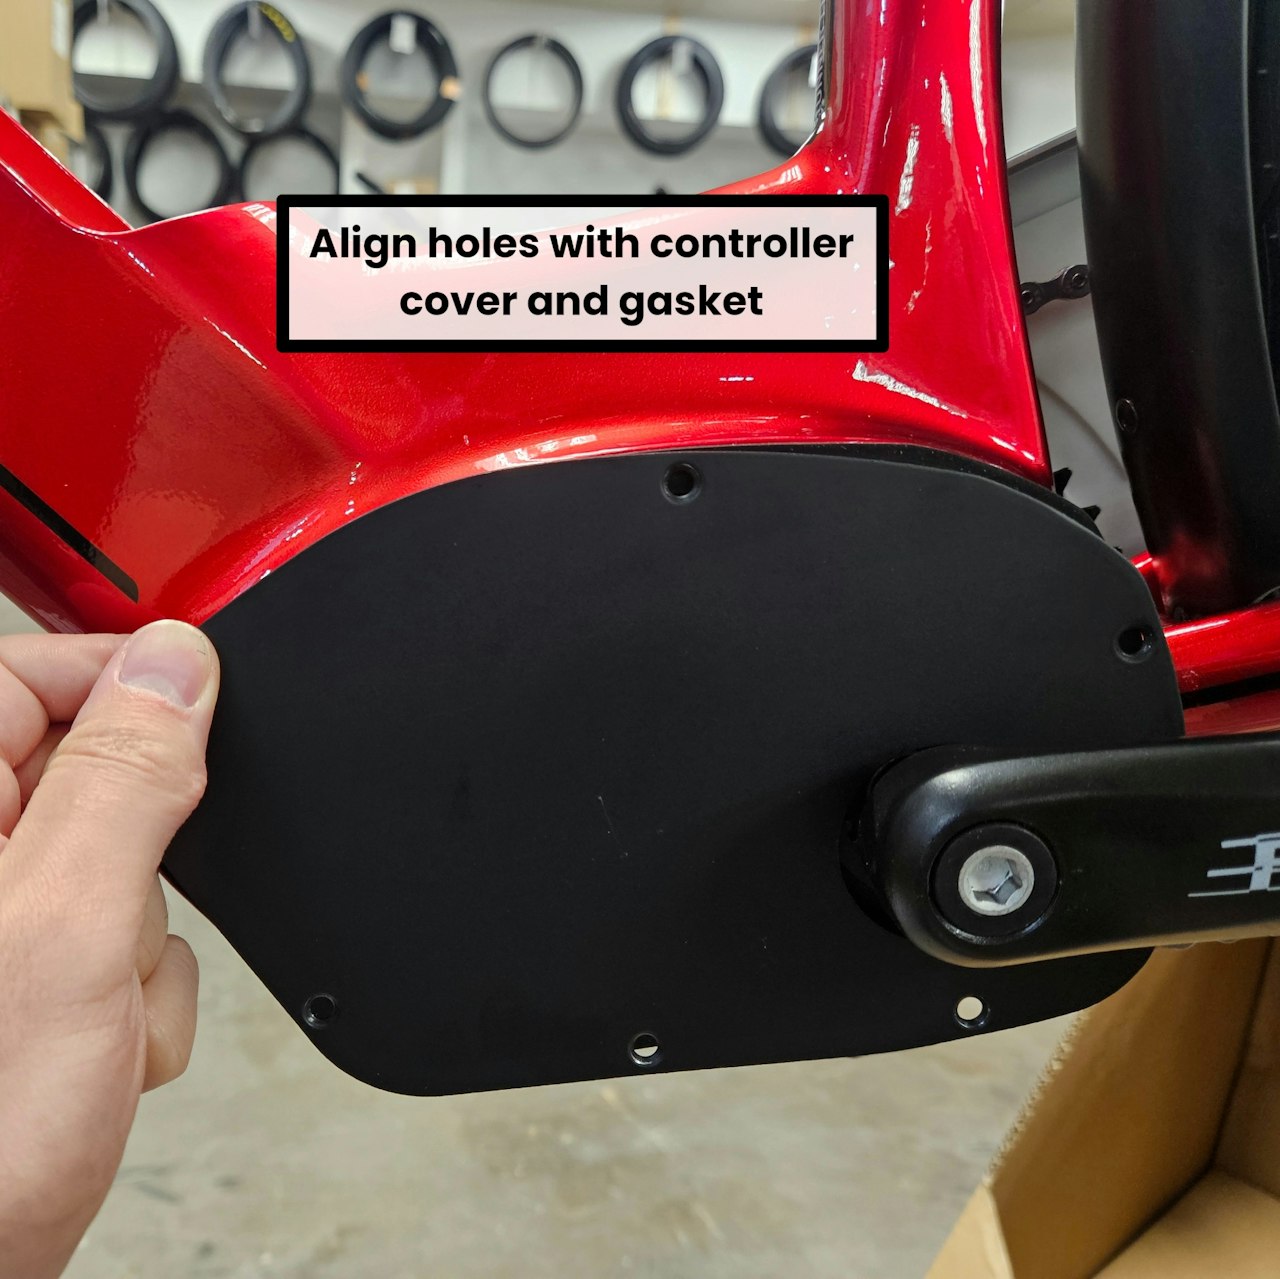
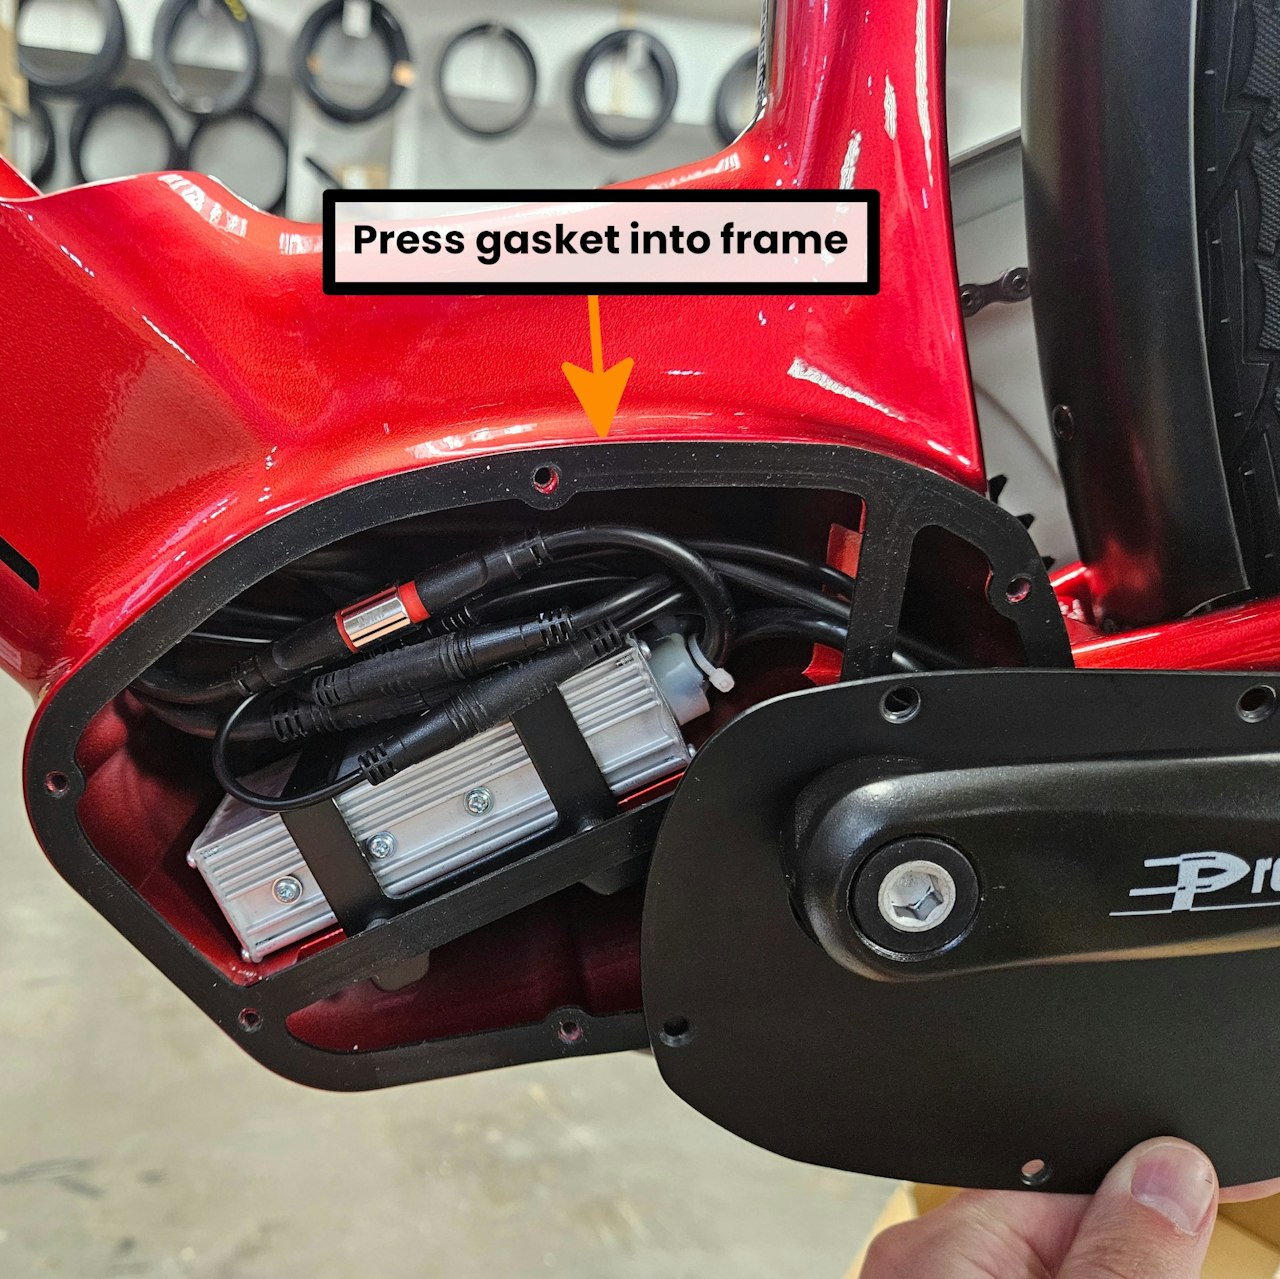
Align the gasket with the frame and apply a slight pressure to the frame to help it stay in place during initial reinstallation.
Take one screw and the controller cover. Loosely thread in this one screw by 2-3 turns into a holt on the top of the frame
Take a second screw, align a hole on the opposite side of the frame with the controller cover and gasket and install by 2.3 turns.
Repeat until all the screws are installed in the holes loosely. Then fully tighten the screws with the screwdriver.
You have now replaced your Stunner Lite 3 controller. Reinstall your battery and take the eBike for a ride!

