
Introduction
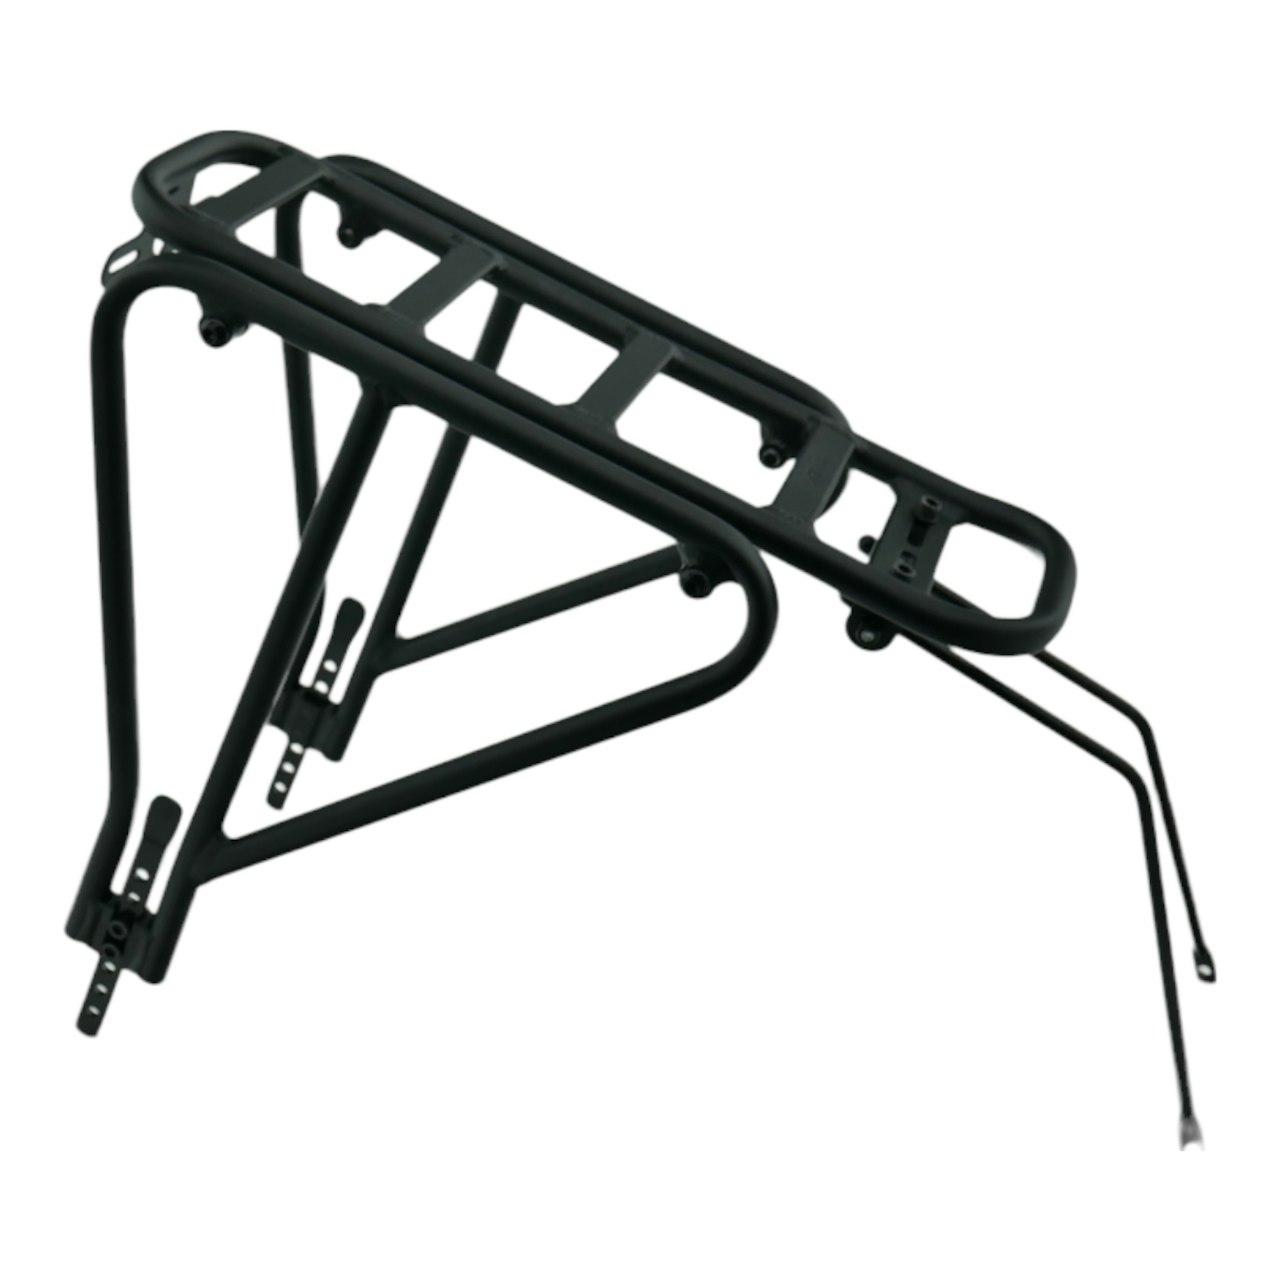
Follow along with this guide for instructions on how to install your Universal Rear Rack onto your eBike.
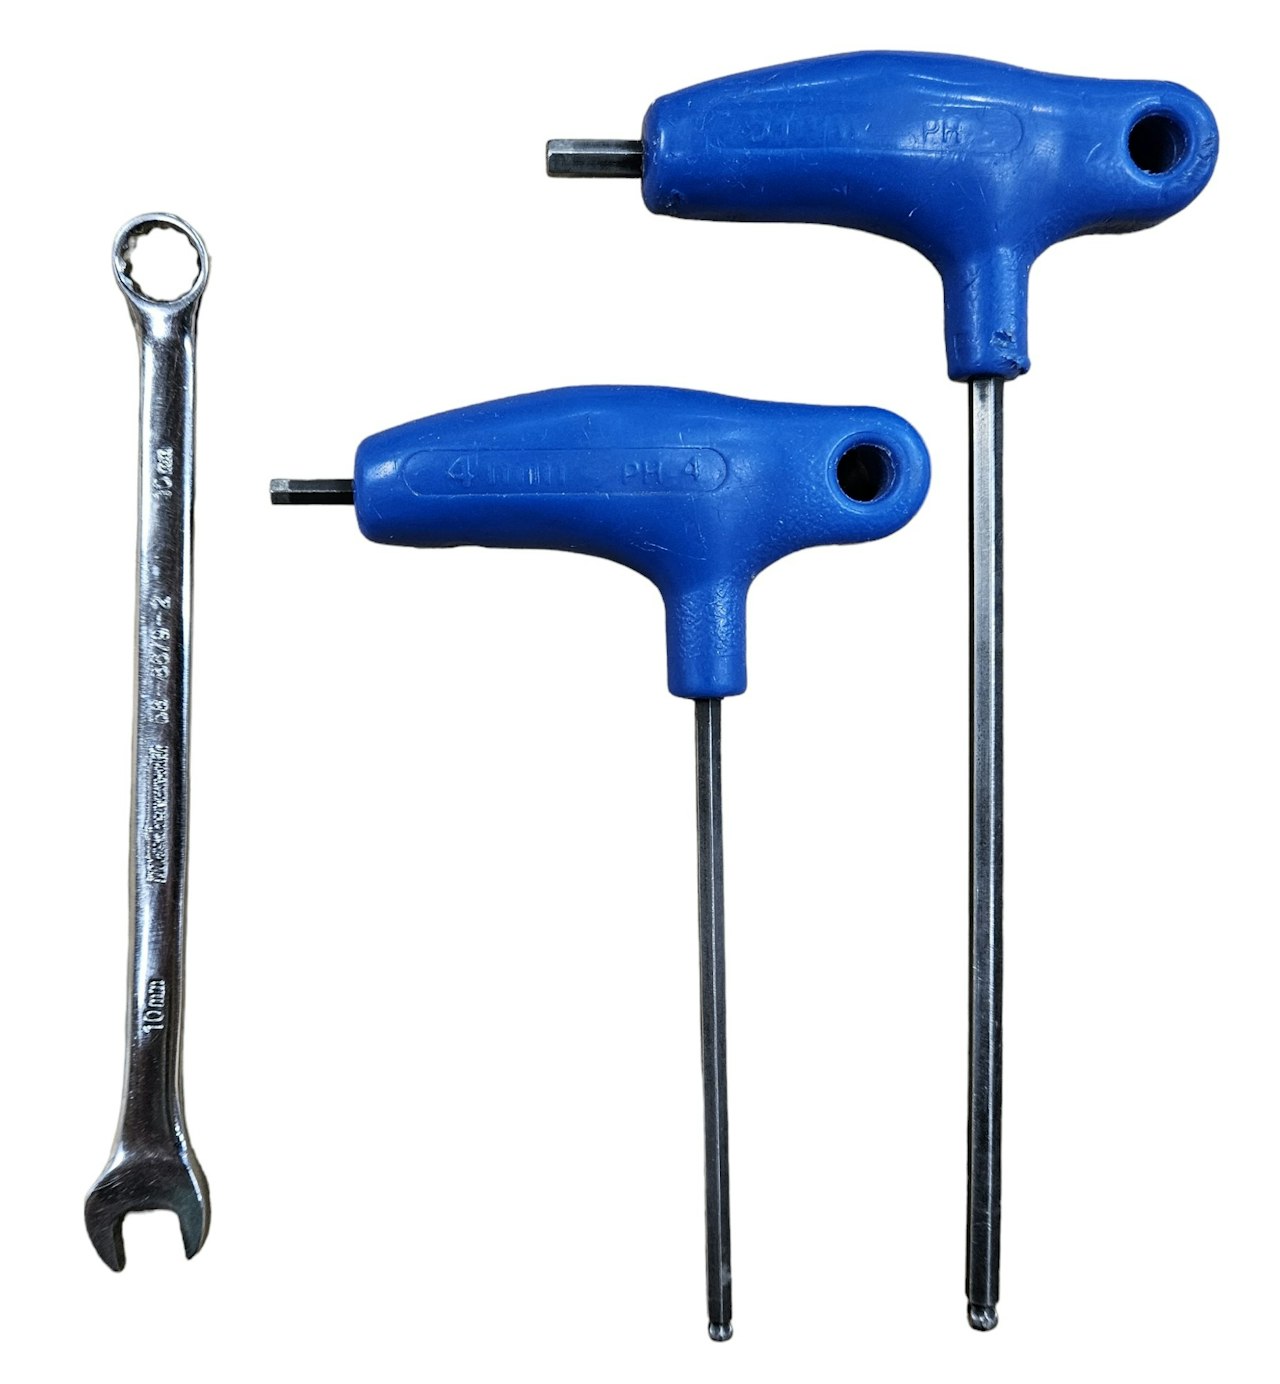
You will need the following tools to install the Rack:
4mm Allen Key
5mm Allen Key
10mm Wrench
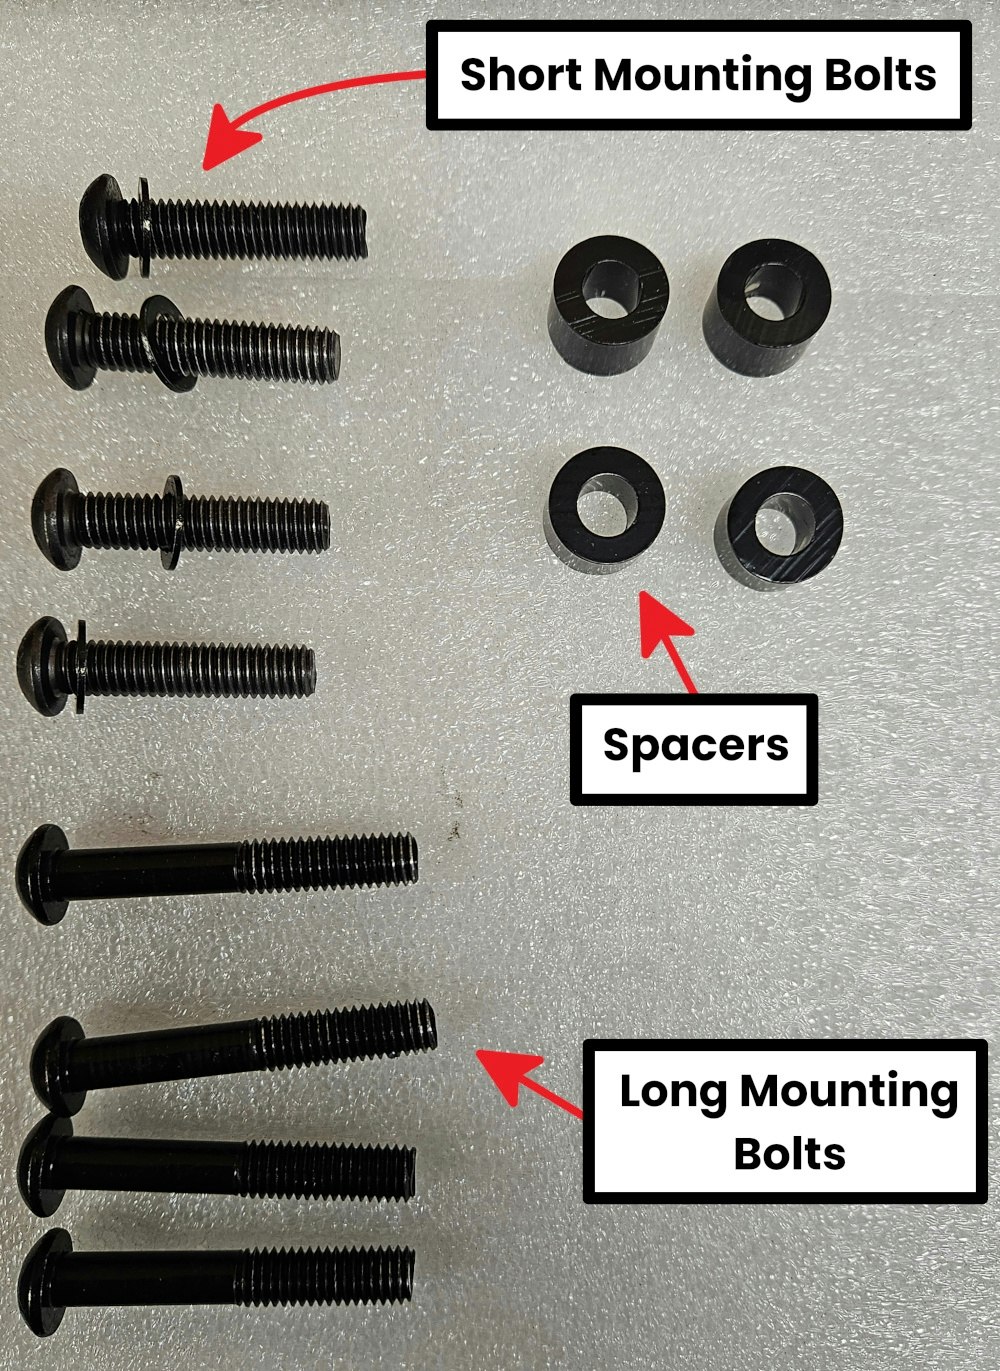
All the hardware you need to assemble the rack will be included. Tools are not included. If you have lost the original mounting hardware get in touch with Biktrix providing your order number or bike model and we will do our best to point you in the right direction!

Step 1
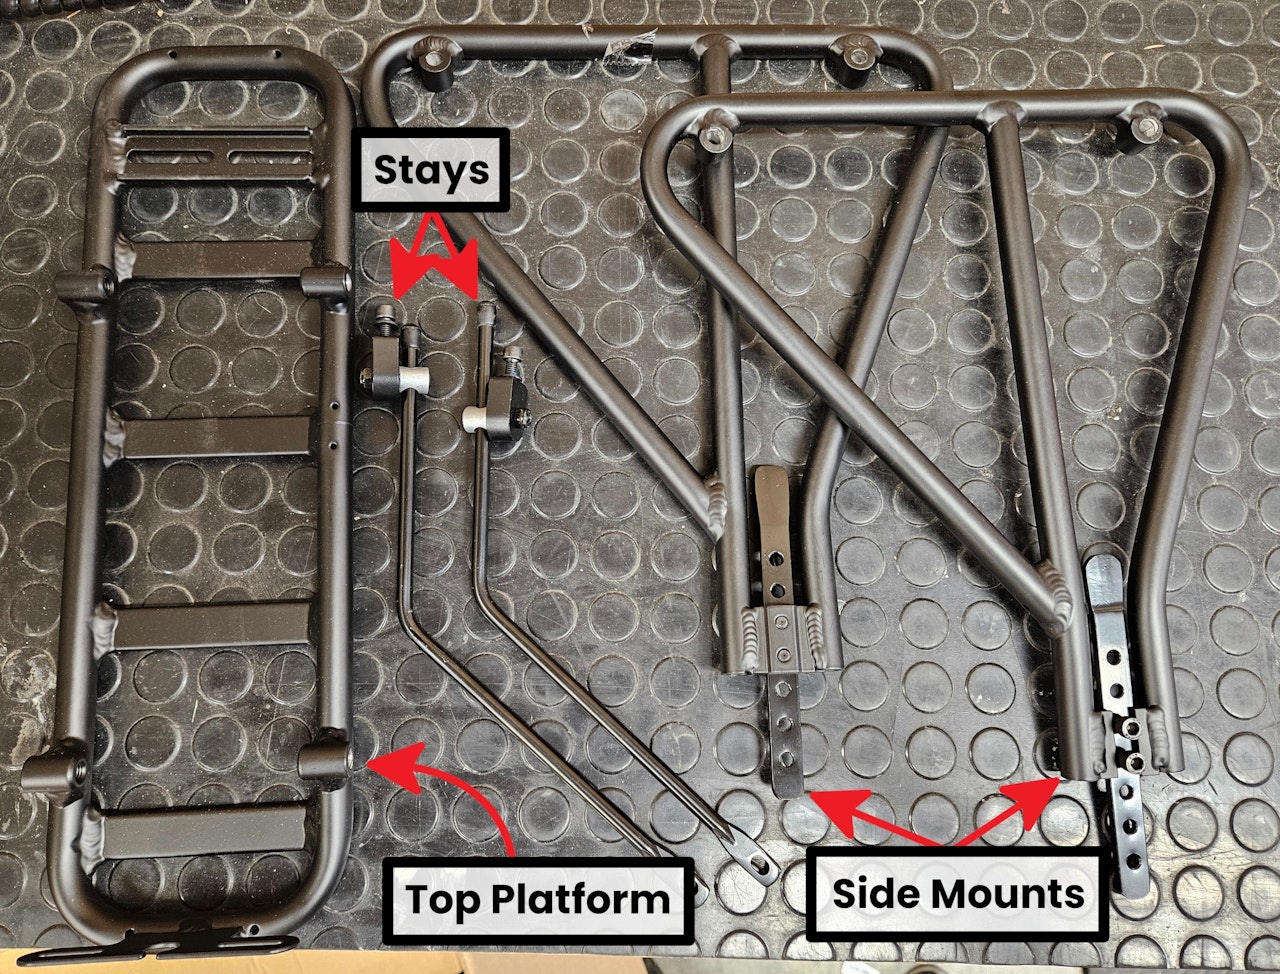
Unbox and unpack all the parts which come with the Universal Rear Rack. There will be a bag of rack parts, and a bag of hardware.
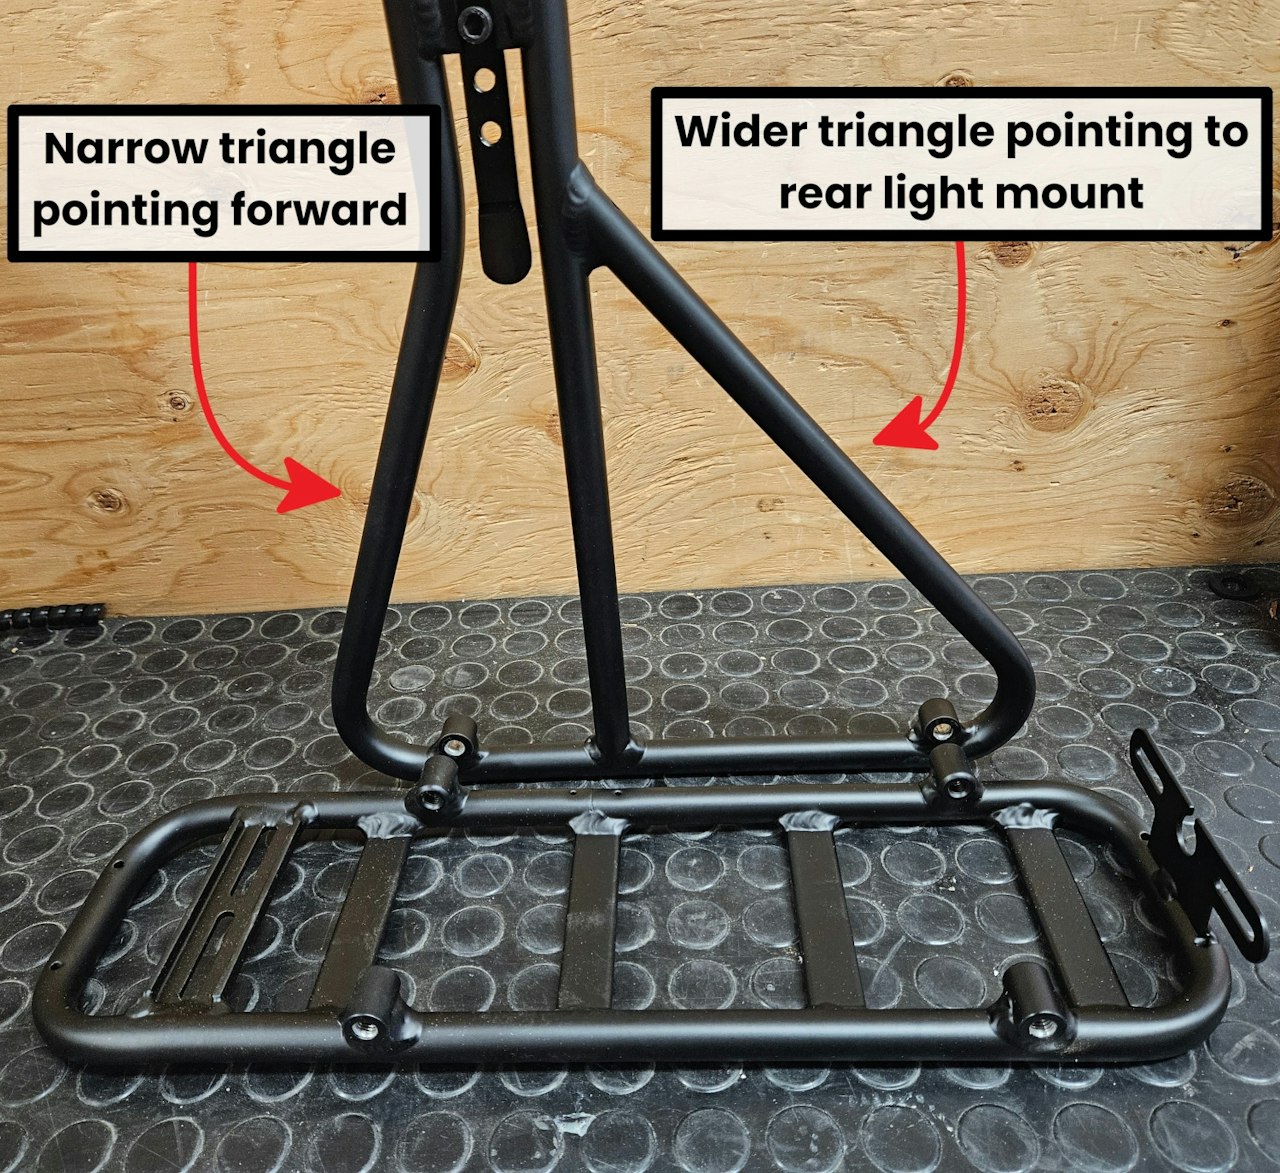
Take one of the side mounts and the top platform. Align this such that the larger triangle is pointing towards the rear light mount and the narrow triangle pointing forward.

Step 2
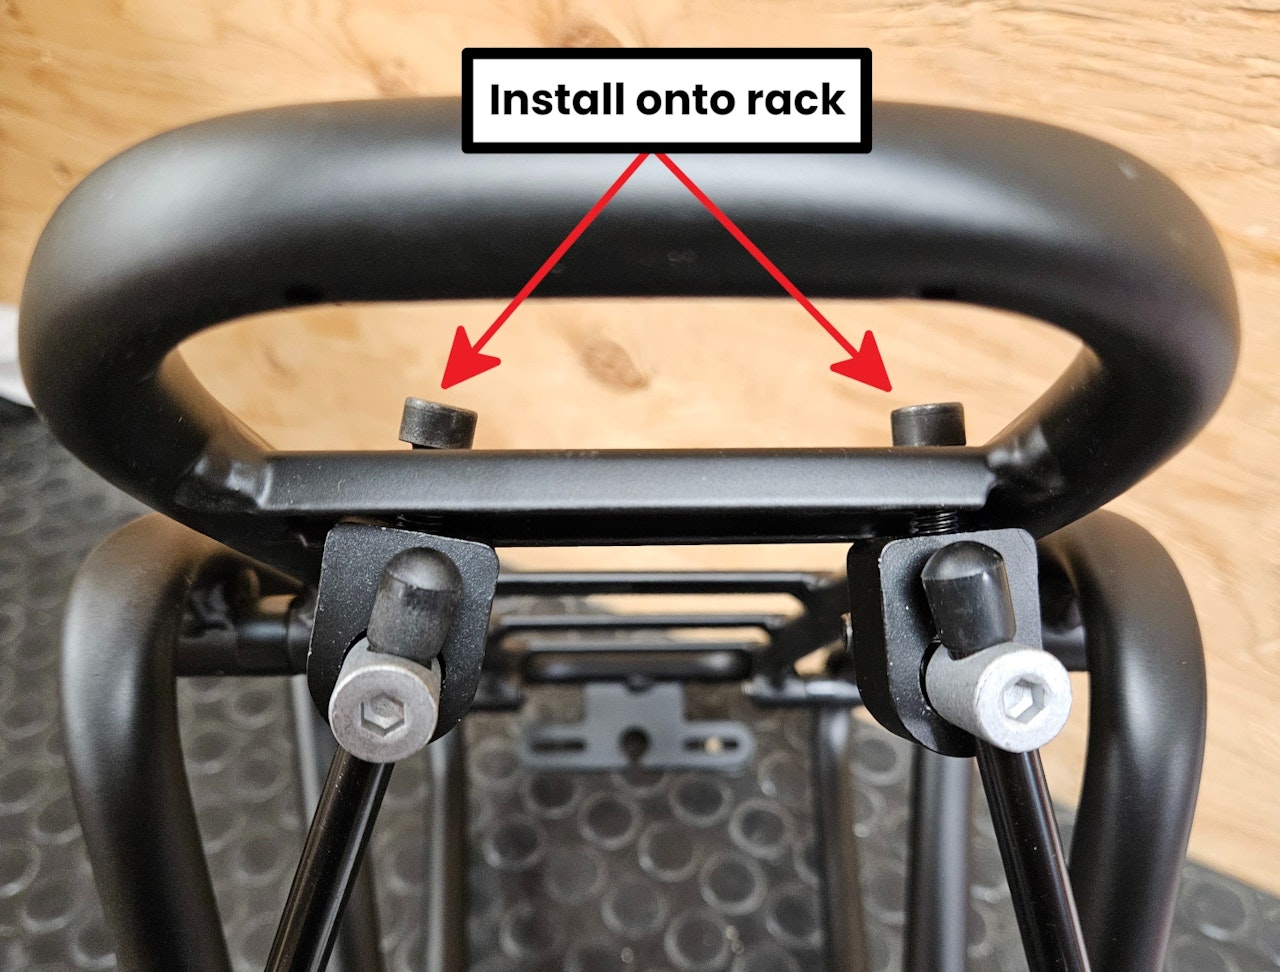
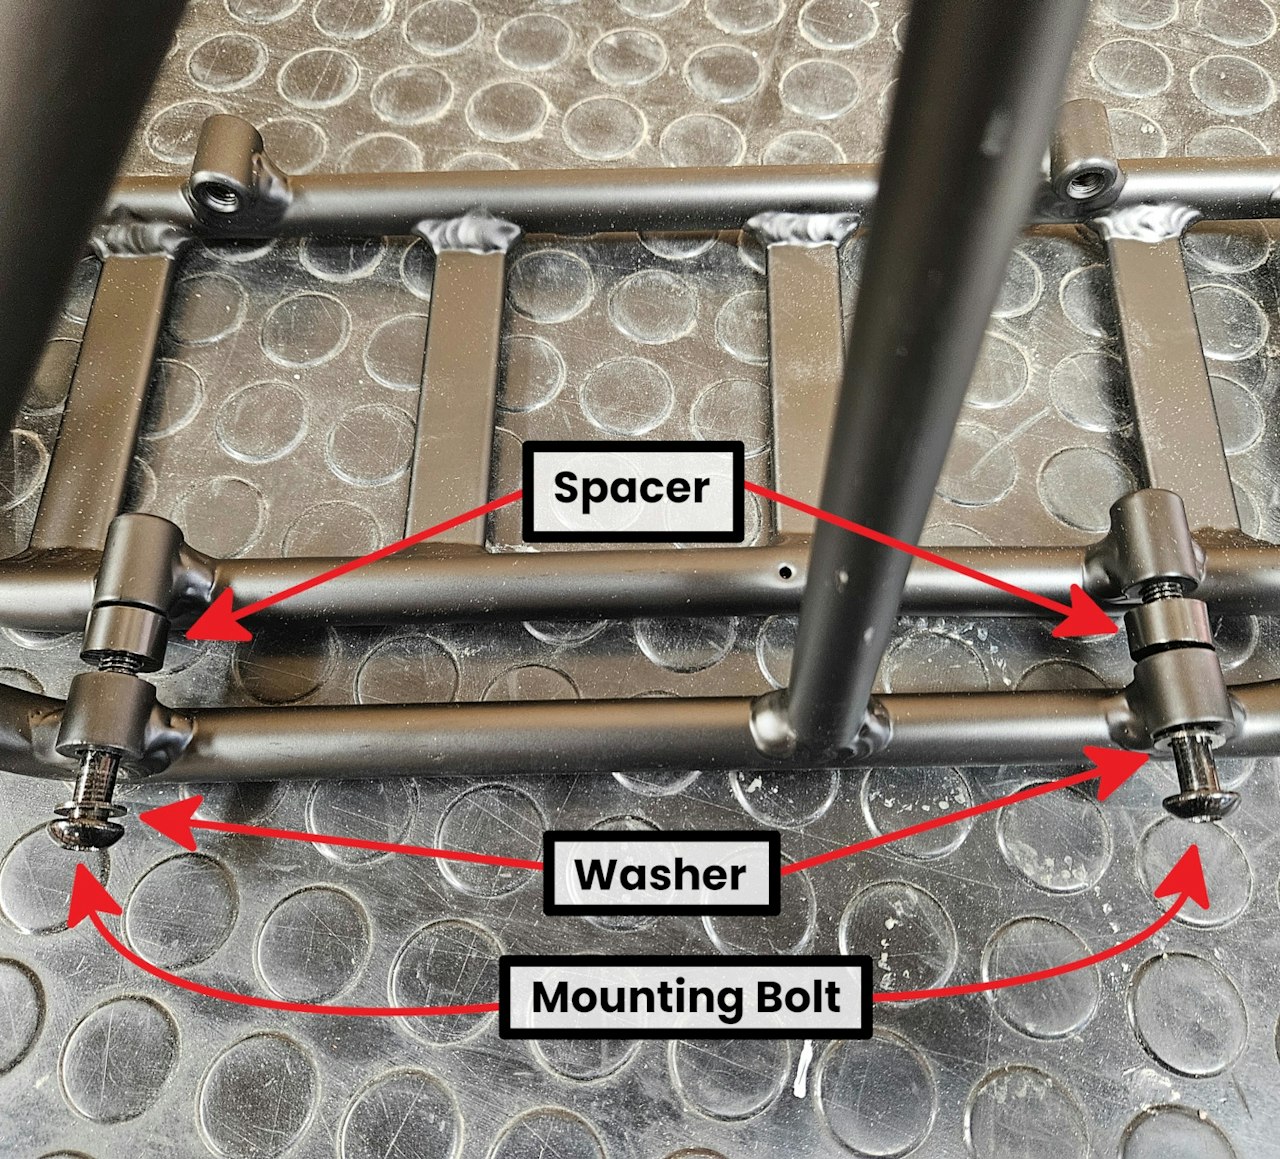
Take one of the longer mounting bolts and a spacer OR a shorter mounting bolt. Use this to connect the side mounts to the top platform. Loosely thread the bolts into the rack using the 5mm Allen key - do not fully tighten them yet
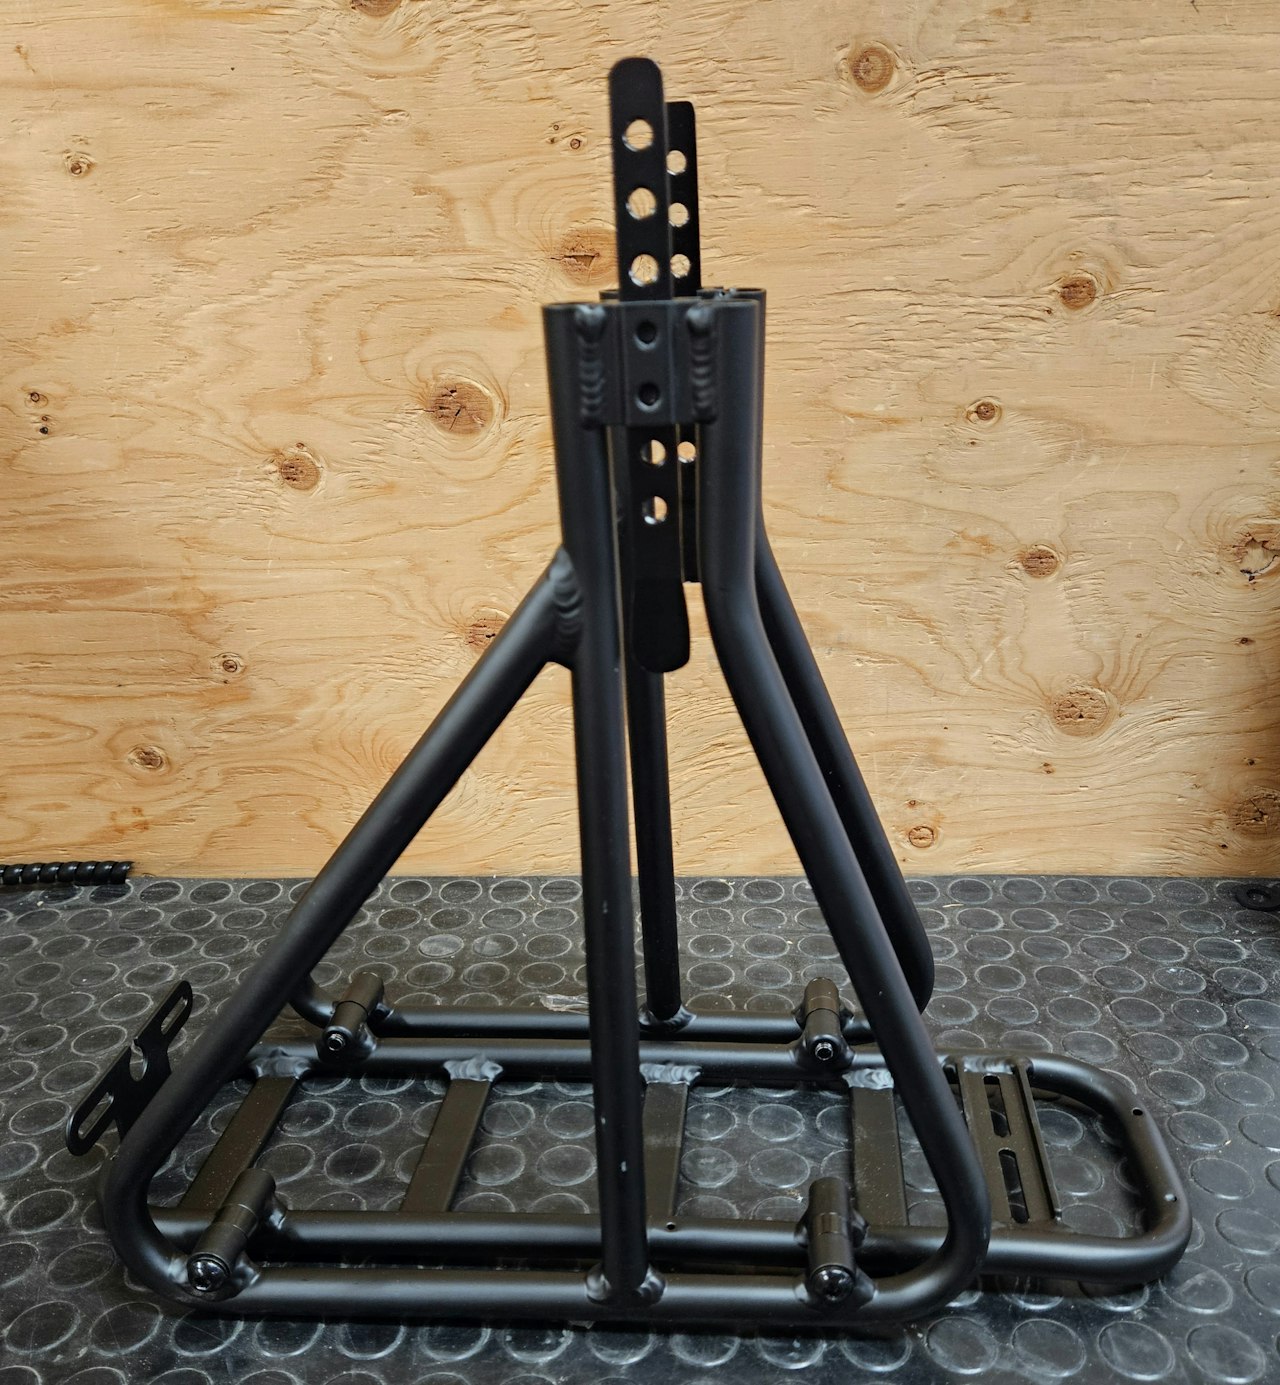
Repeat this process with the second side mount to attach it to the top platform as well.
Proceed to the next step when both side mounts are attached to the top platform.

Step 3
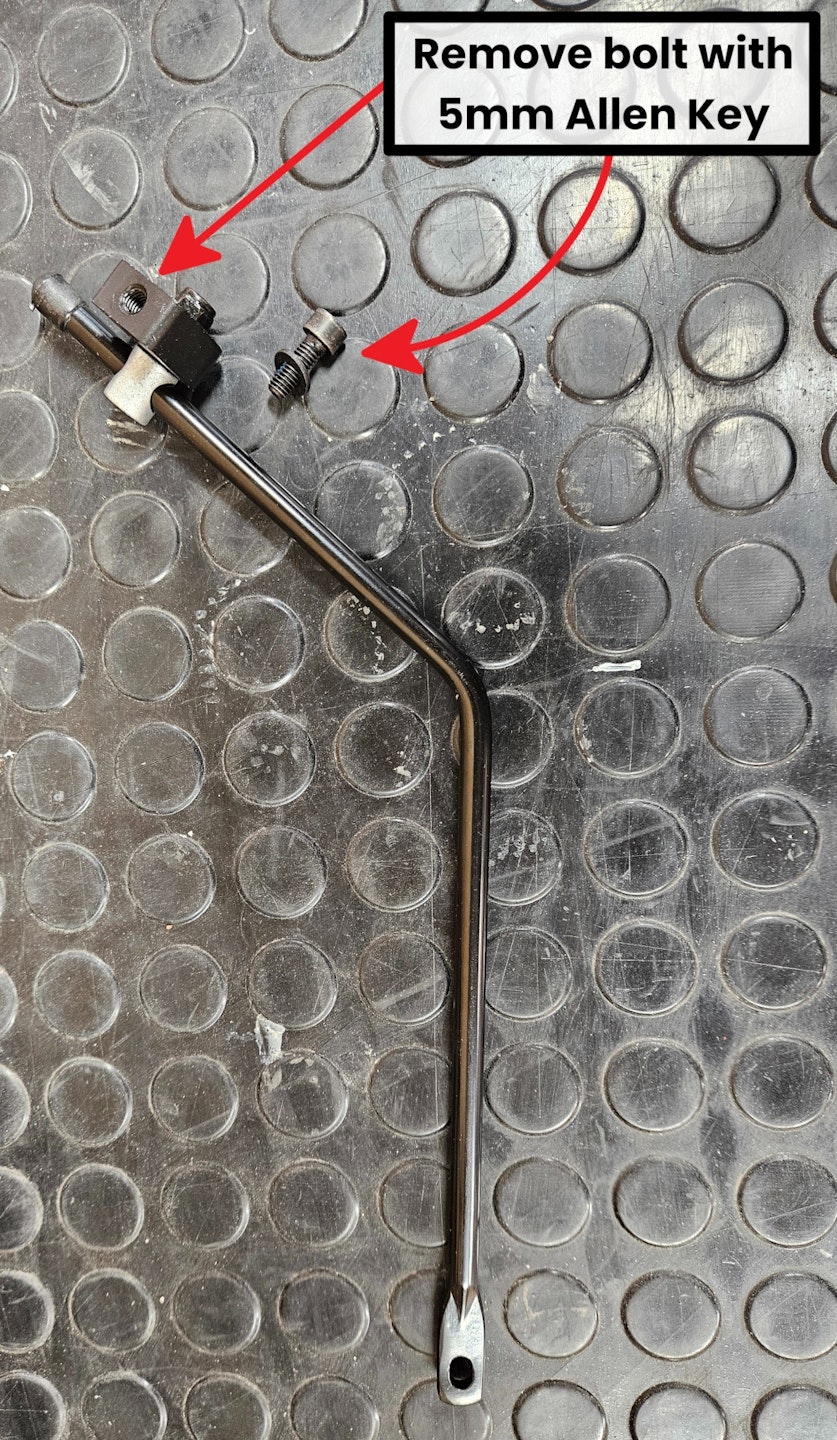
Take the two stays and remove the black bolts from them with the 5mm Allen Key.
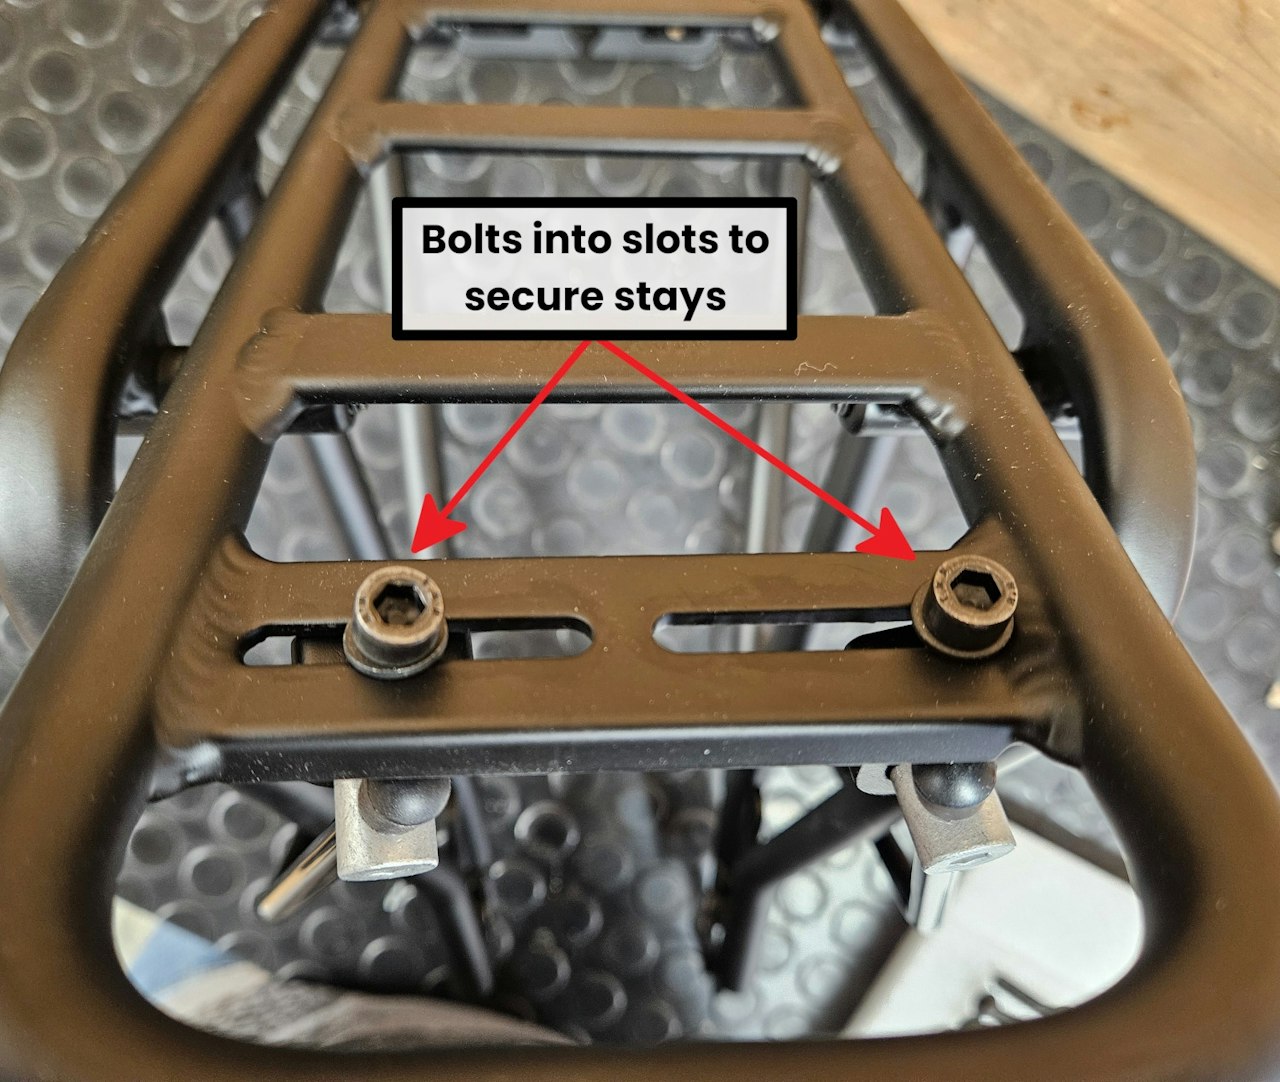
Attach the stays to the slots on the front of the rack. Insert the bolts into the slots, then align the the ends of the stays with them.
Tighten the bolts into the stays by 3-4 turns with a 5mm Allen Key.

Step 4
Go to the bottom of the side mounts - we will adjust the rack height here before installing it onto the eBike.
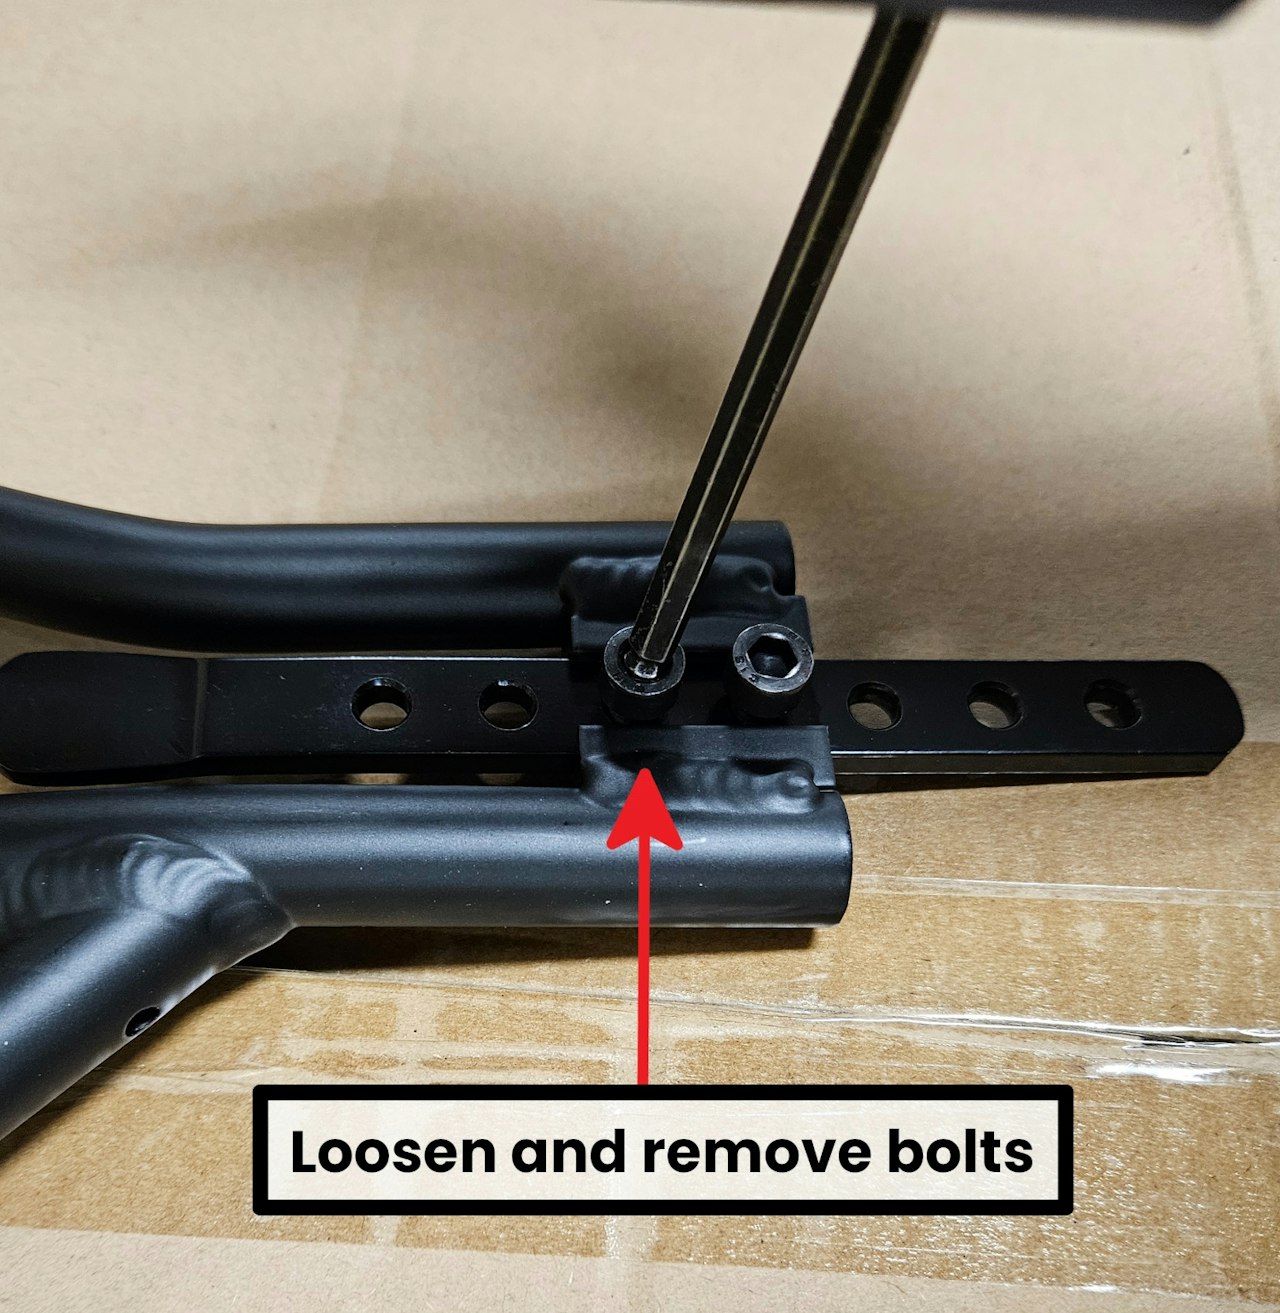
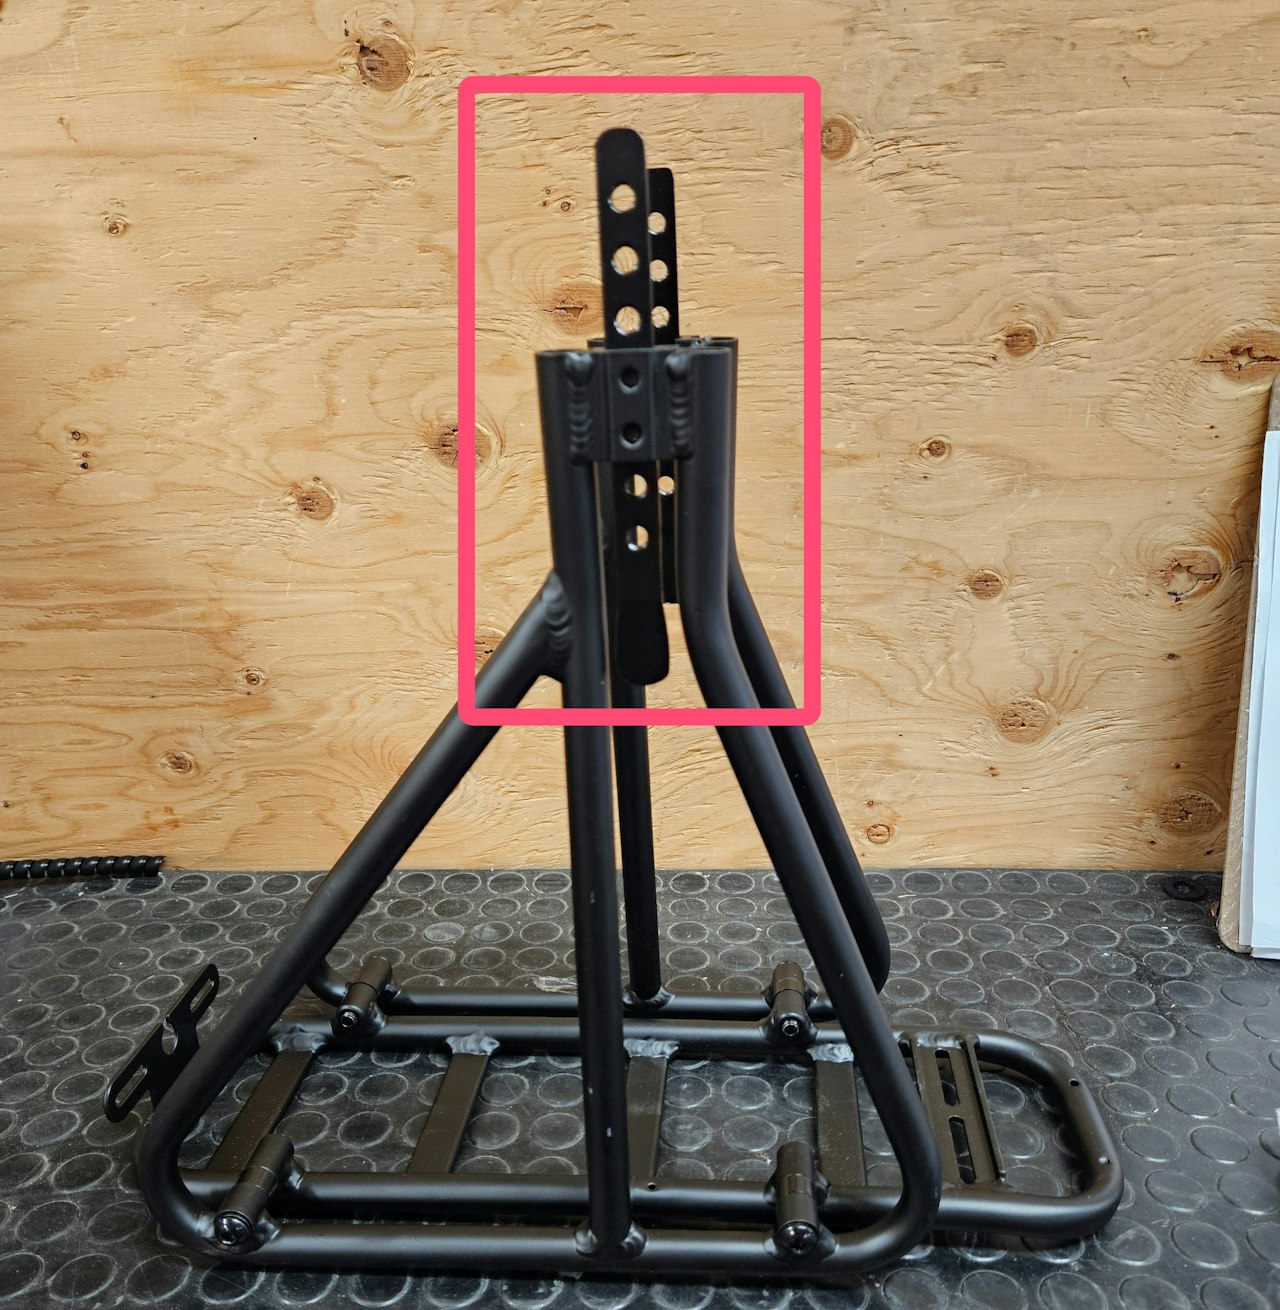
Loosen and remove the two bolts holding the adjustable sliding mount to the side mount with the 5mm Allen Key.
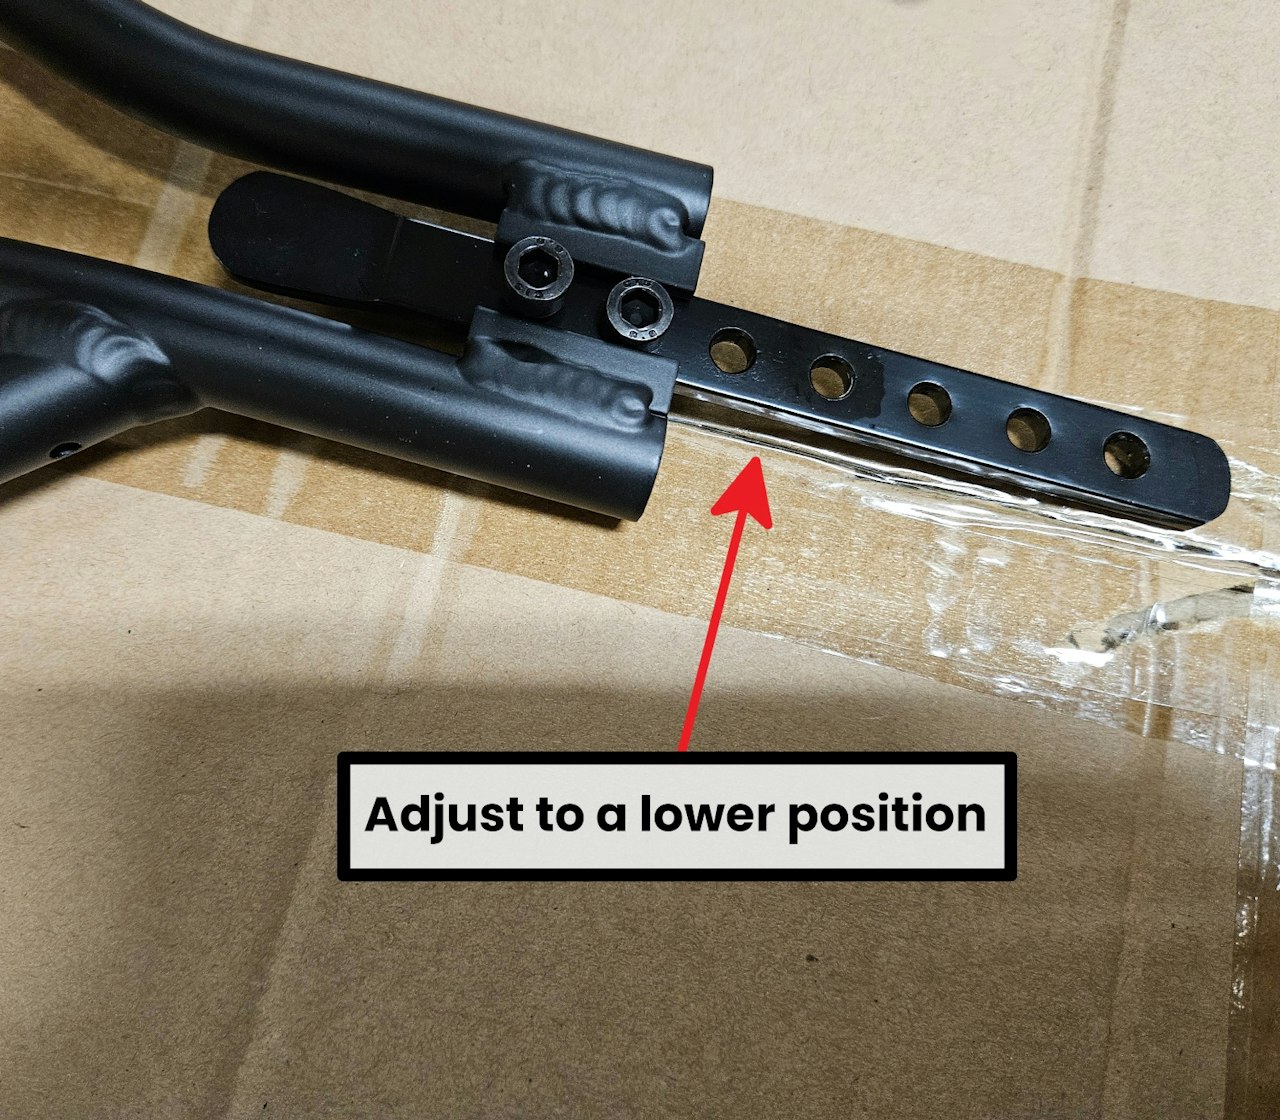
Move the Sliding mount so more of the holes are on the bottom - like in the third picture.
Reinstall the two bolts when the slider is in position repeat this for both sides so they are symmetrical.

Step 5
Line up the rack with the rear end of your eBike.
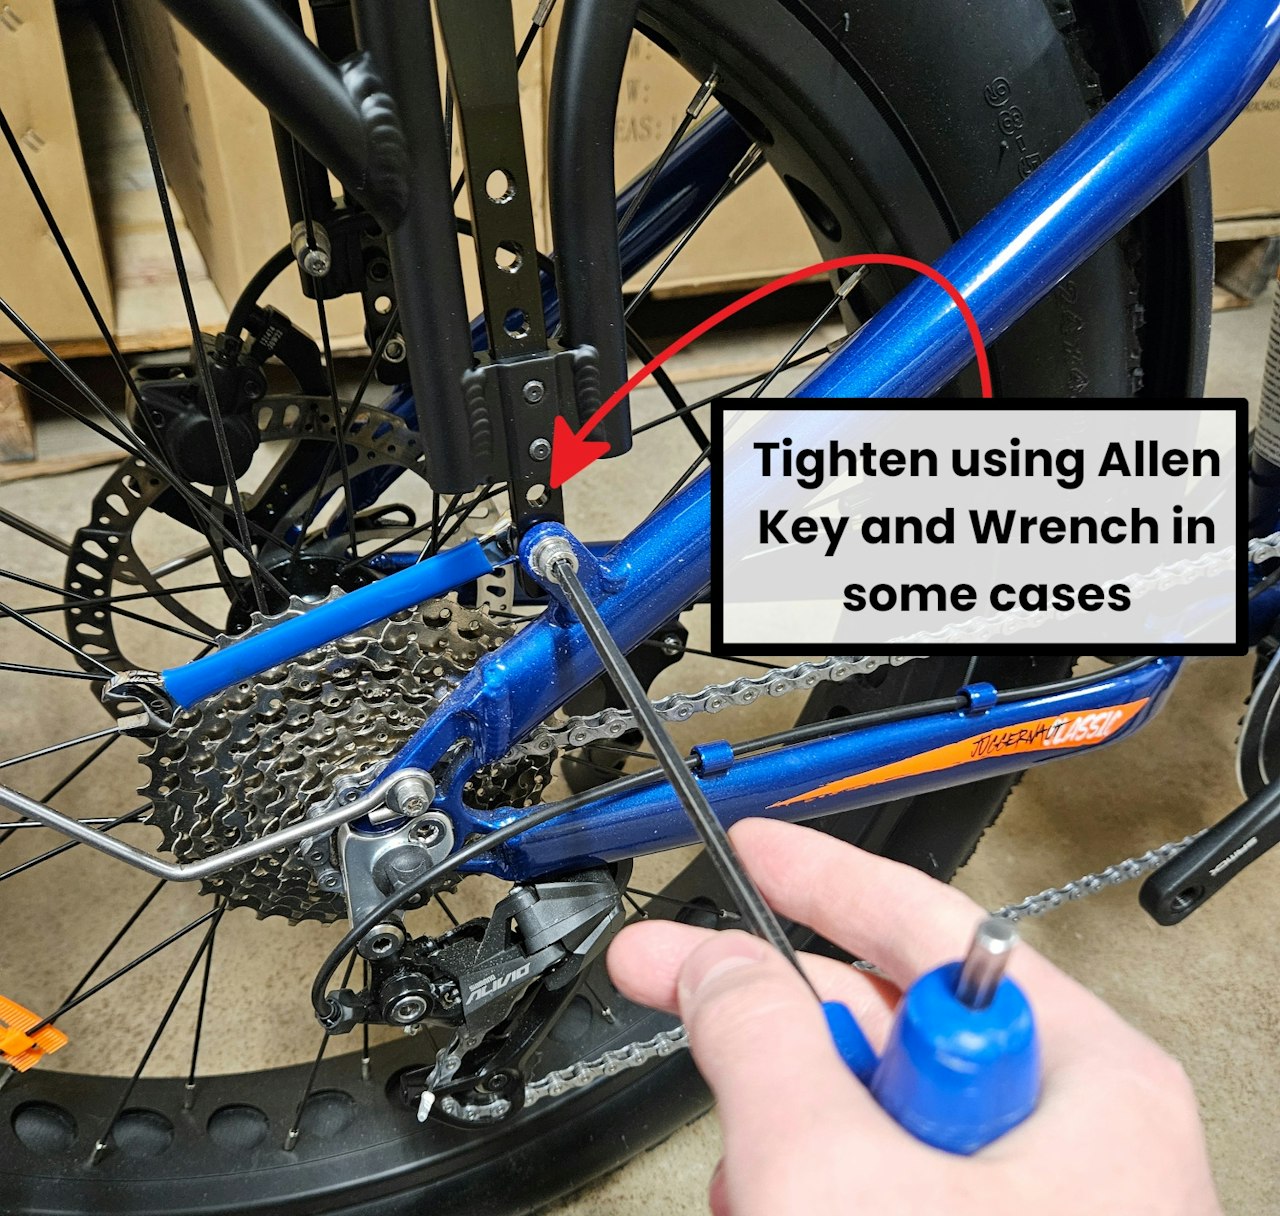
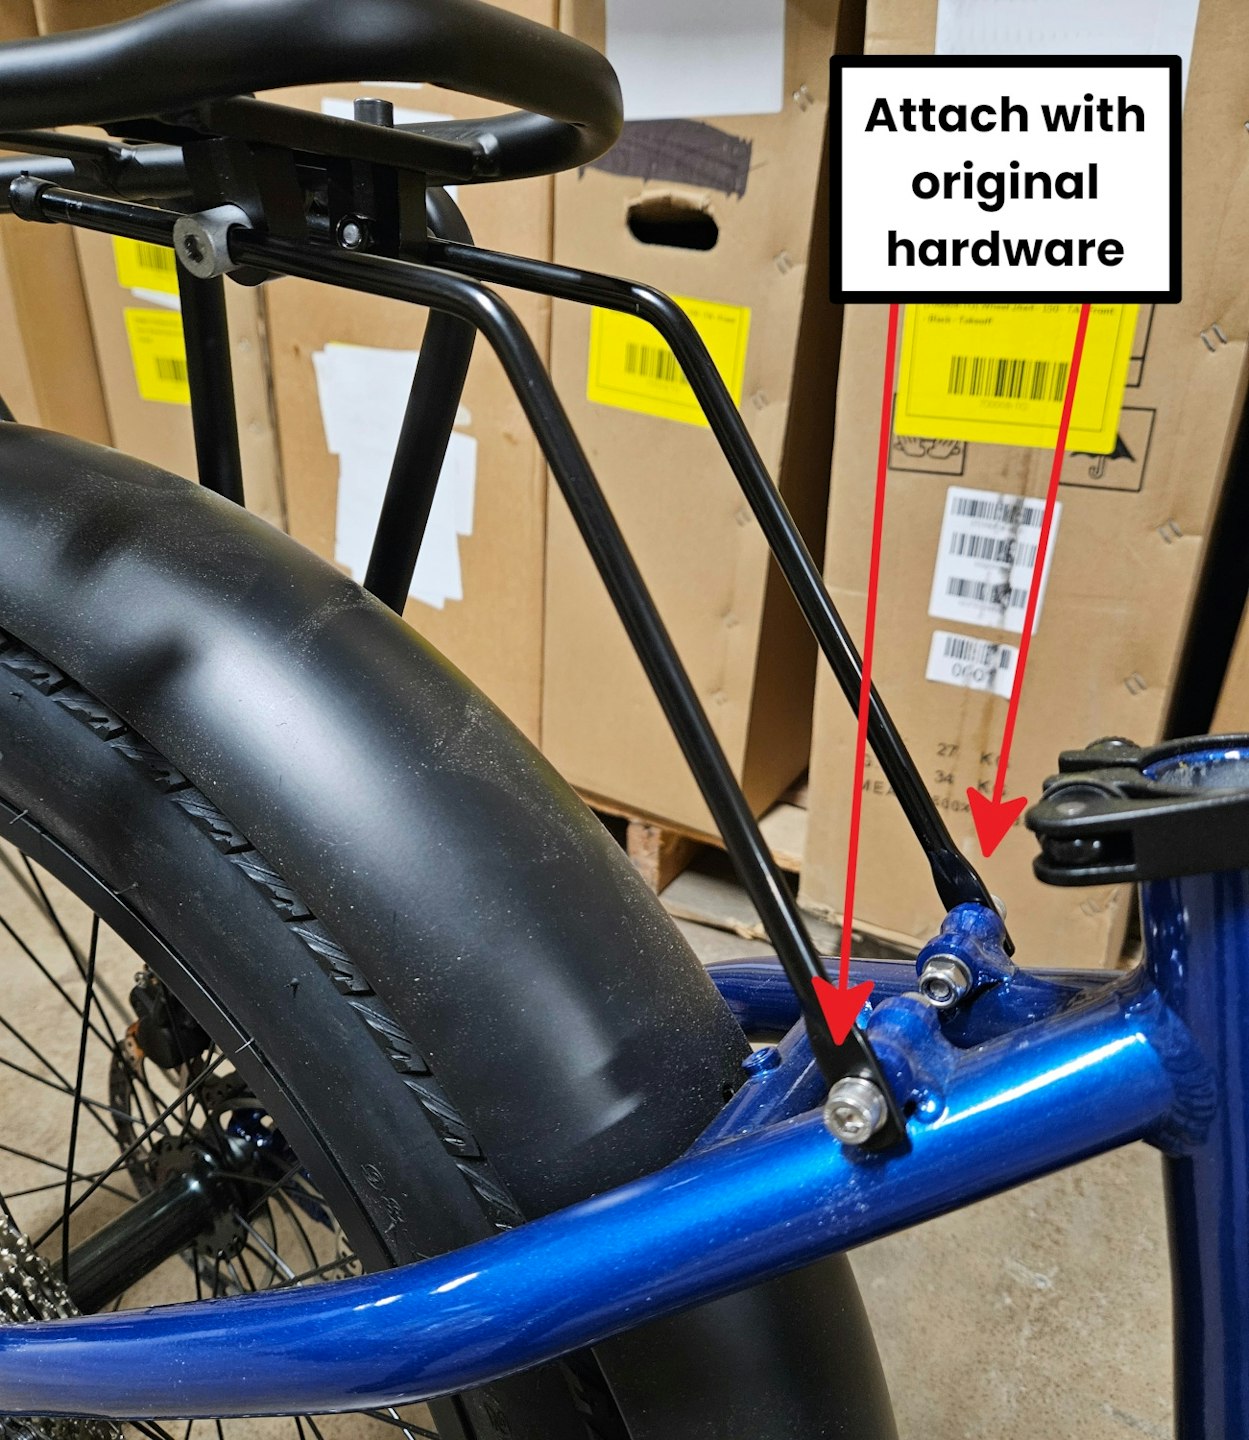
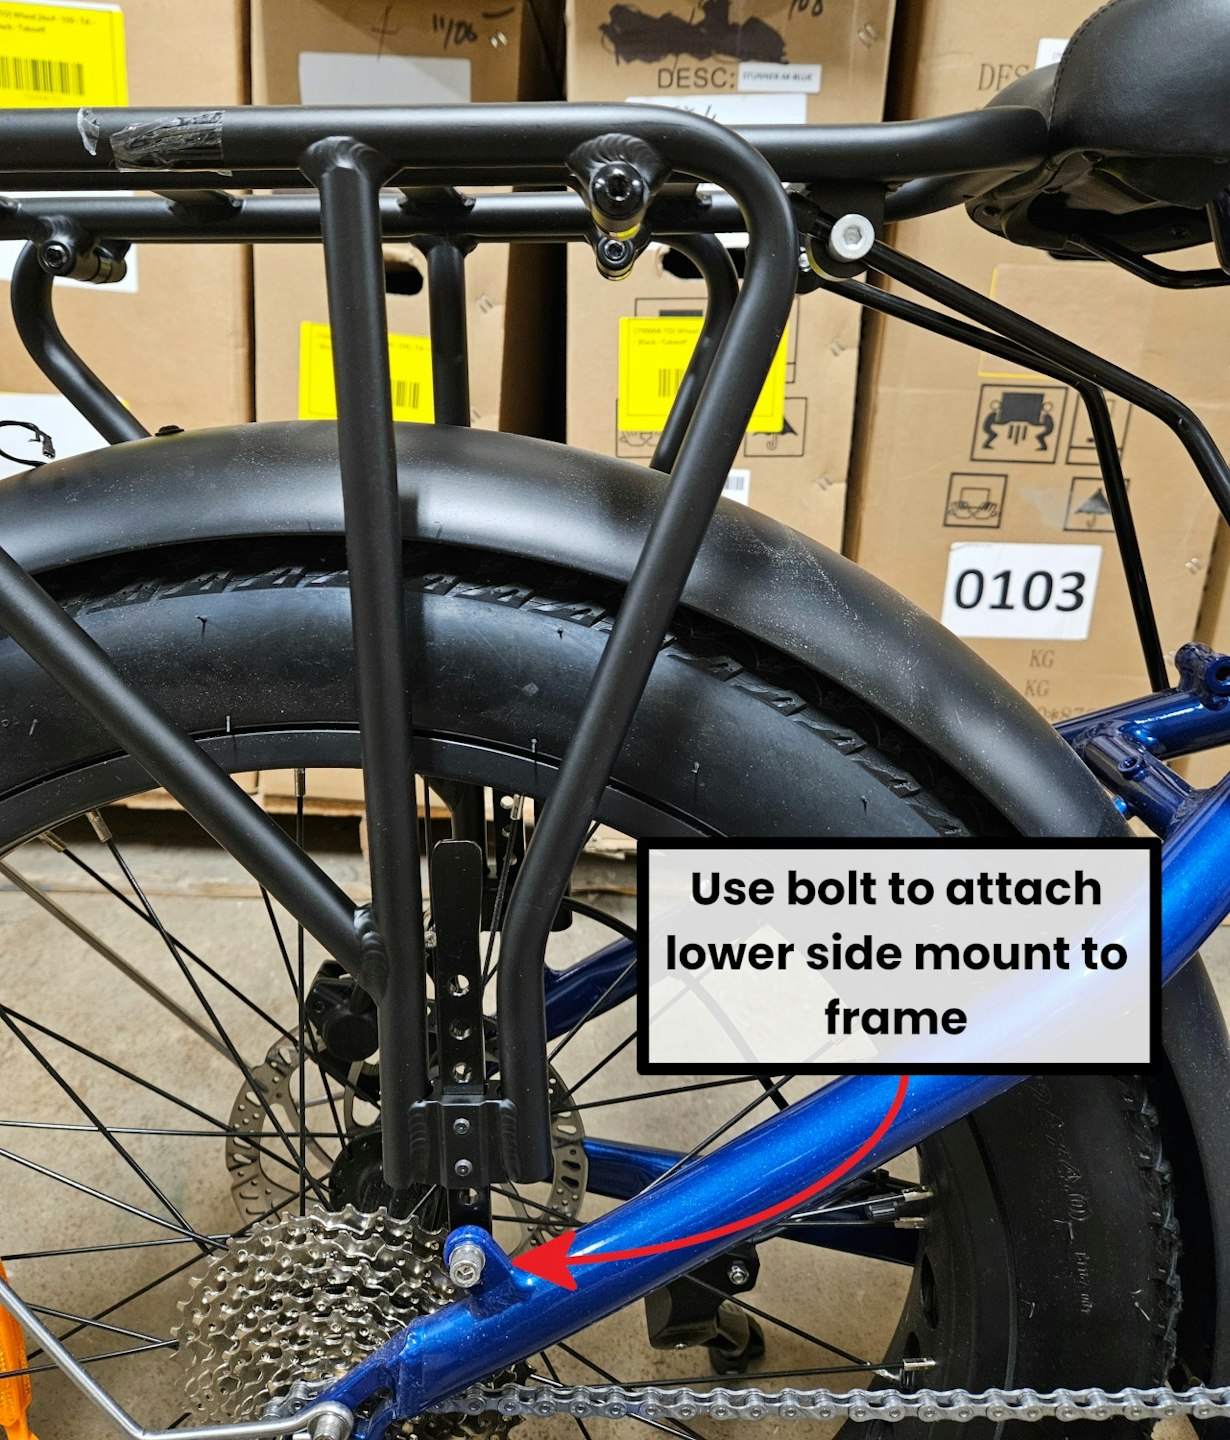
With the rack over the bike attach the sliding brackets to the eyelets on the lower frame seat stays using the original hardware.
Step 6
Loosen the adjustment nut and attachment bolt of the rack stay with a 10mm Wrench and 5mm Alen Key. this can be manipulated in many directions as seen in the third image.
Manipulate the rack stay so it is in line with the mounting holes on the bike.
Use the original hardware to mount the stay on the bike - reinstalling it in the same manner as removal.
Retighten the adjustment nut and bolt which you previously loosened by reversing the pervious step you followed to loosen it.

Step 7
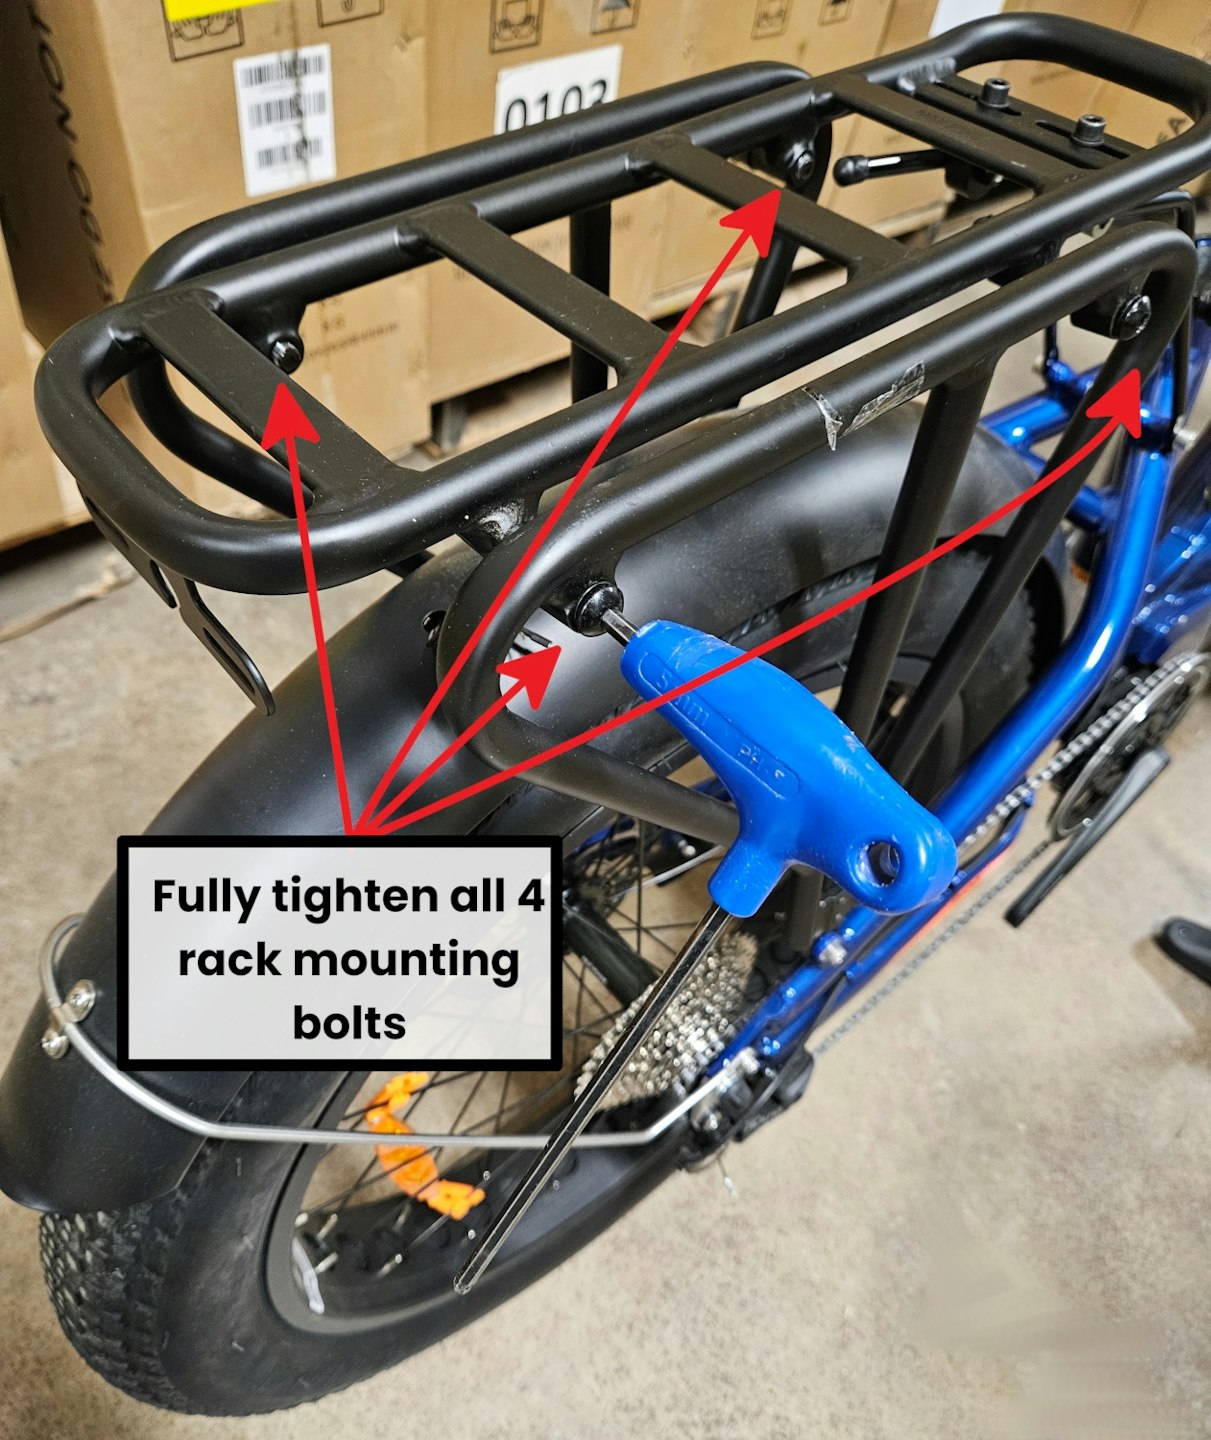
Fully tighten all 4 rack mounting bolts with the 5mm Allen Key. This will sinch the top platform and the side mounts together.
Double-check all other mounting bolts and hardware to ensure they are tight.
If your rack is extremely high you may need to revisit "Step 4" to adjust the rack height.
Reattach any taillight onto the rack if you haven't done it already. Also reattach any wires that power this taillight to the rack with some small zip ties.
You have now assembled and installed your new Universal Rear Rack!

