
Introduction
If you received a new Rear Wheel for your Juggernaut XD you must install the secondary drive sprocket and brake rotor onto it before putting it on the bike! Follow this guide for instructions on how to do so!
You will need the following tools to do this:
8mm Socket/Wrench
Ratcheting Wrench
Torque Wrench
Blue Locktite
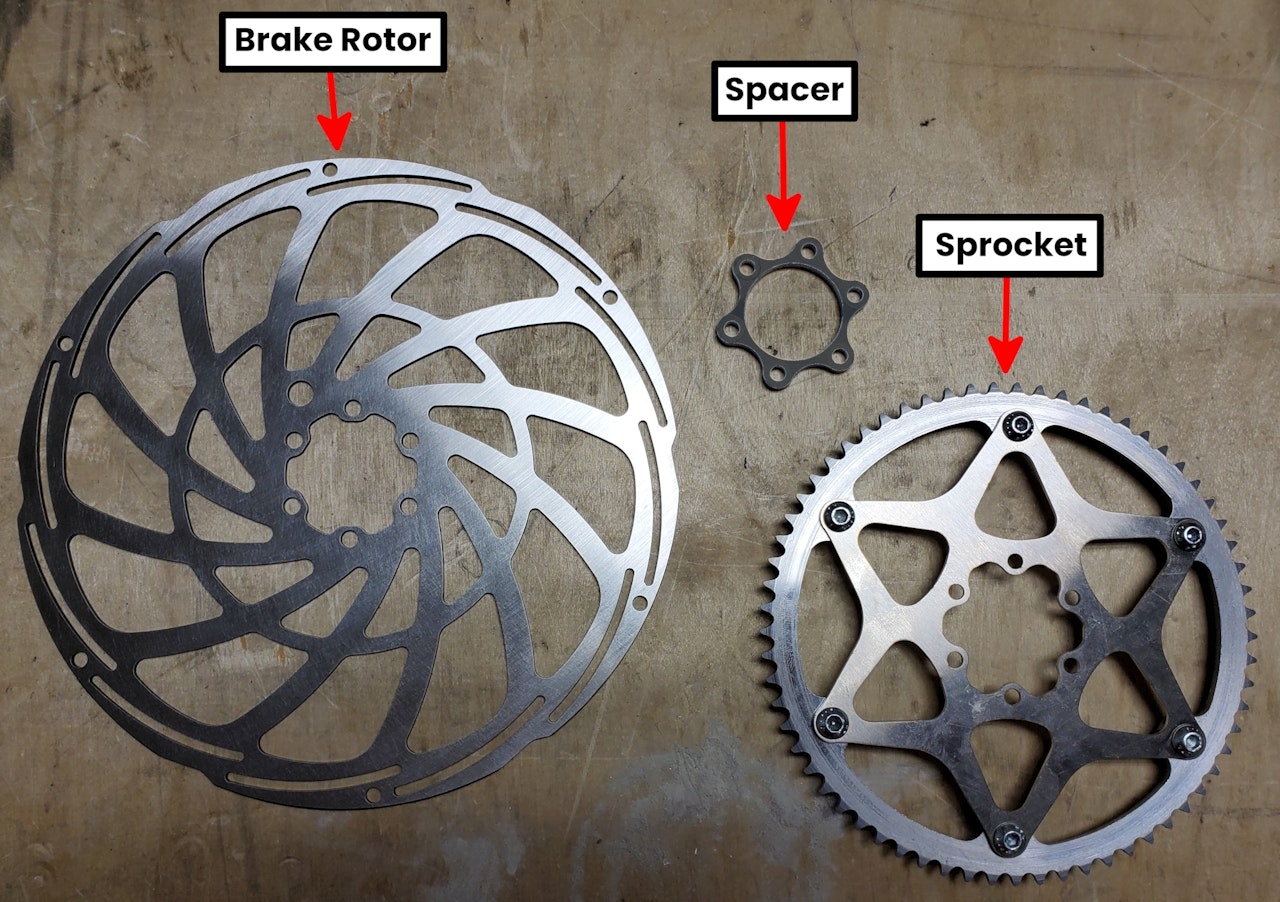
Check out the first attached image to see the terminology used for the parts you will need to install on the wheel - the Brake Rotor, Spacer and Sprocket.
Step 1
On the Rotor Side of the rear wheel install in the following order - Sprocket, Spacer and Rotor.
Take the 6 M5x20 Hex Flange Screws.
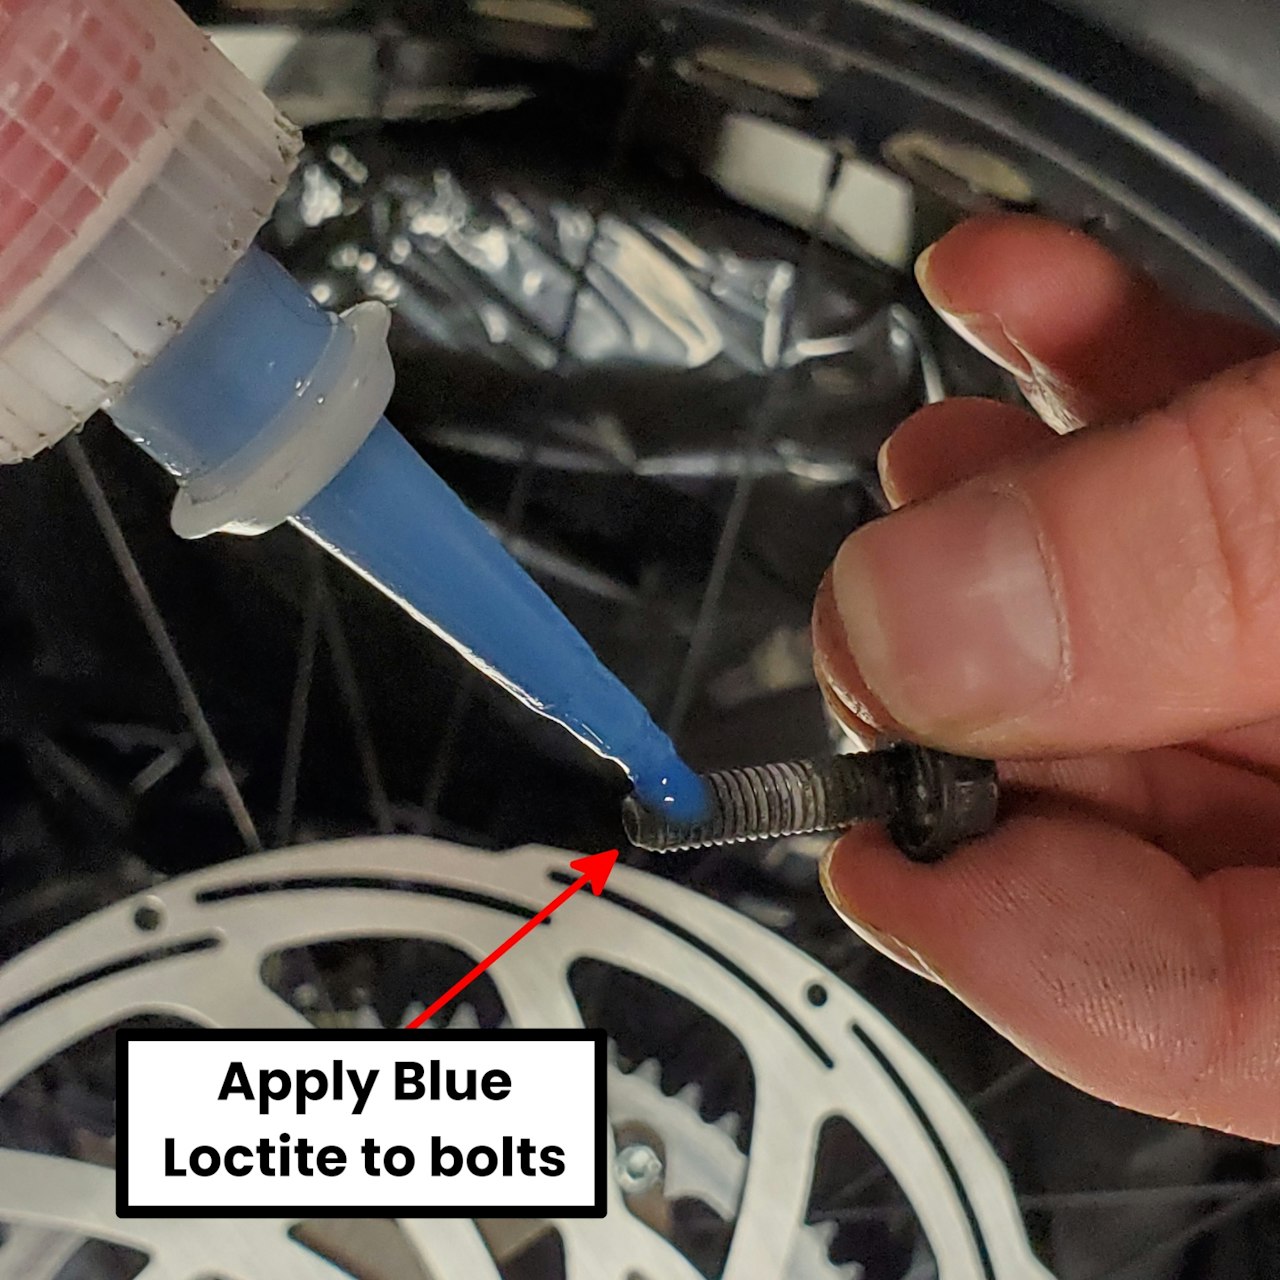
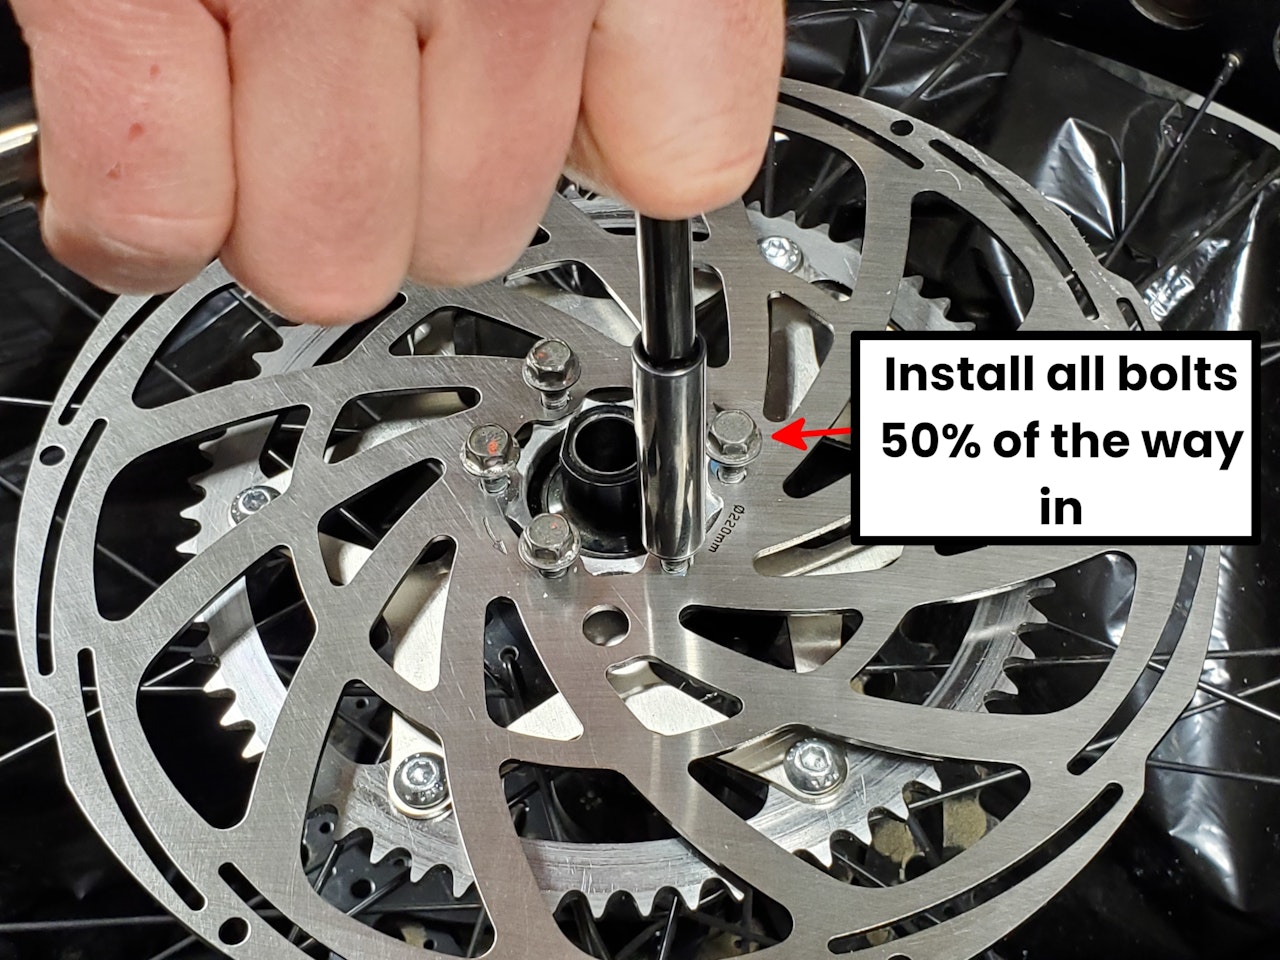
One screw at a time apply Blue Loctite then install approximately 50% of the way into the holes on the wheel hub - enough so you can still loosely rotate the rotor and sprocket.

Step 2
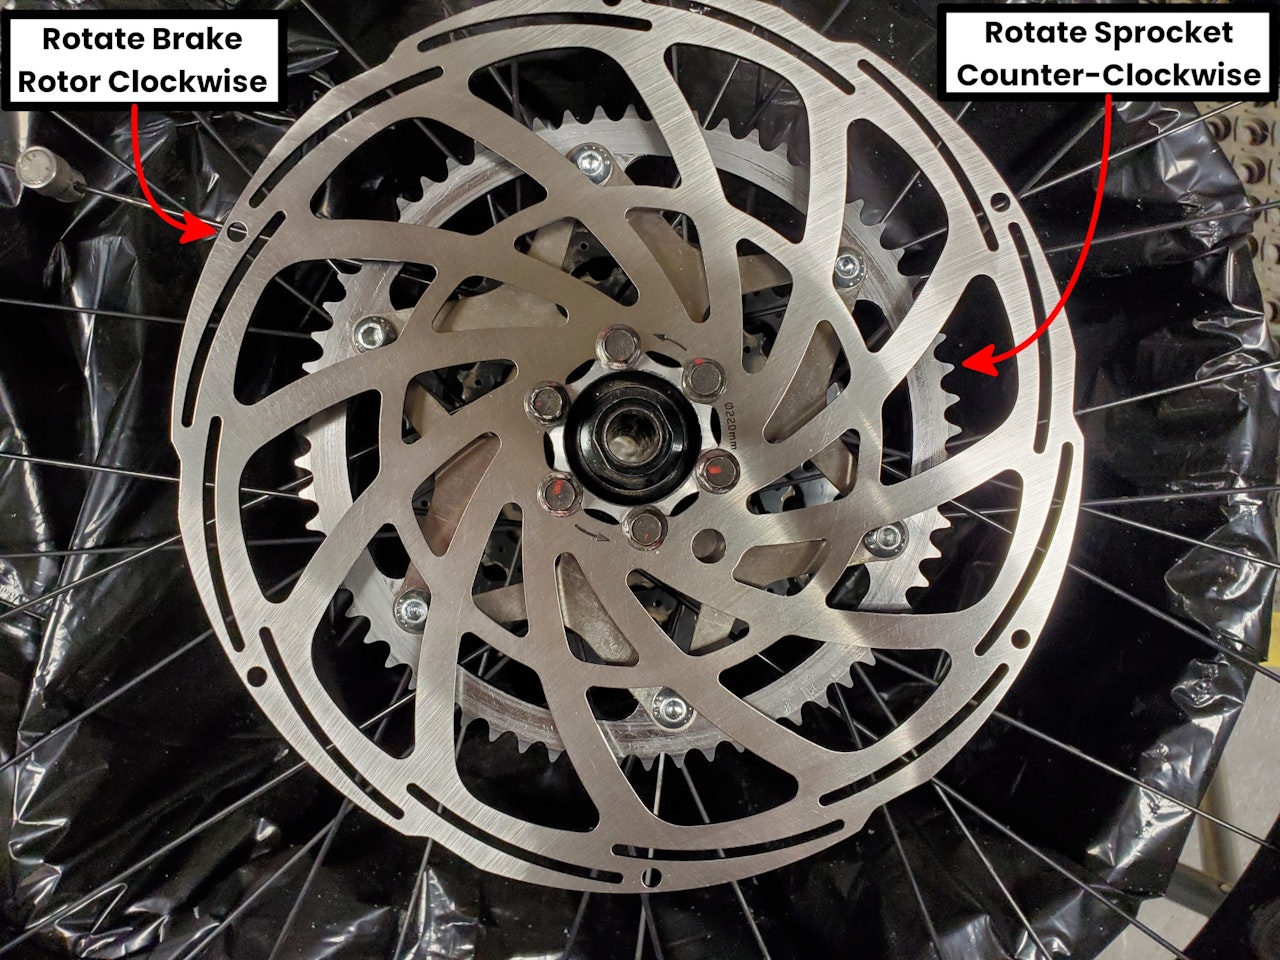
Grab the Brake Rotor and Cassette lightly. You will need to slightly rotate each of them in opposite directions to "preload" them before fully tightening the screws to finish the installation:
Rotate the Brake Rotor Clockwise.
Rotate the Rear Sprocket Counter-Clockwise.
Tighten up the bolts - hand tight or wrench tight is enough here.
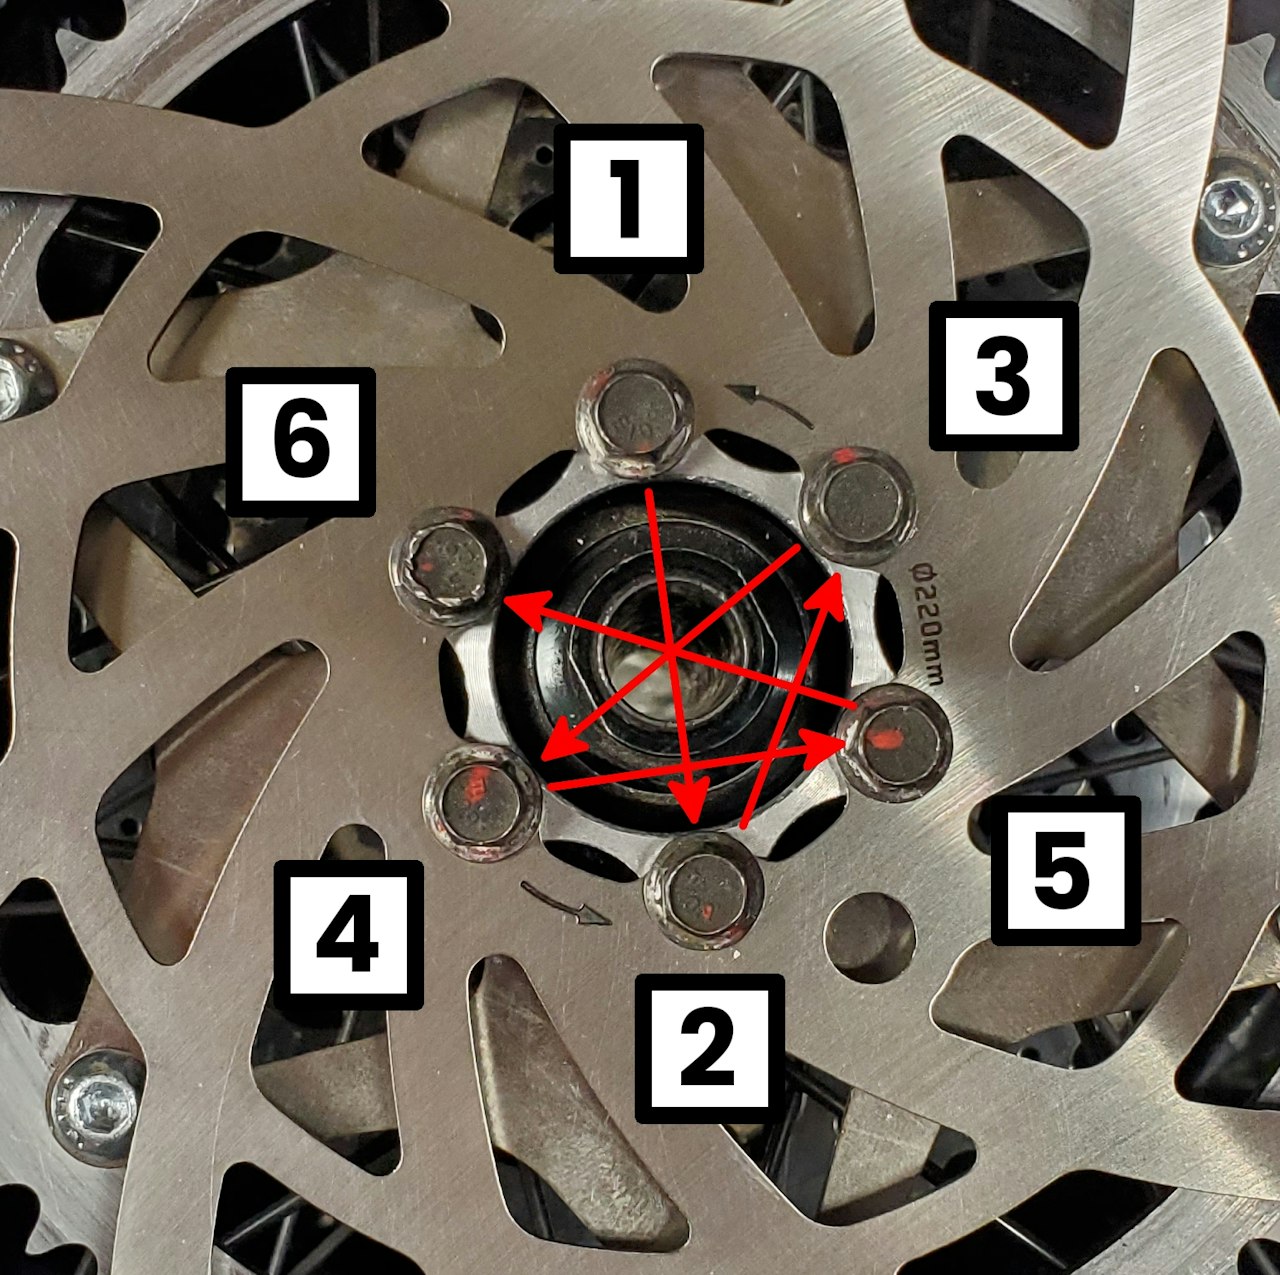
Take the torque wrench and 8mm socket. Set the torque Wrench to 7.5Nm and torque all 6 bolts to that spec in a Star Pattern as shown in the second image here.
Your rear sprocket and brake rotor are now installed! Need help with the cassette or removing and reinstalling the rear wheel? Check out the links below!

